Backpacking in Banff National Park might not get any better than the Skoki Loop! This is an unforgettable adventure and is hands-down one of the most scenic multi-day hikes I’ve ever done.
And here’s why: the trail winds through glacier-carved valleys, over dramatic mountain passes (that aren’t that difficult to cross), and takes you past pristine, super blue lakes. You get nonstop mountain views, wildflowers in full bloom, and the feeling of total wilderness! Plus, the trailhead is super easy to get to, it’s less than 10 minutes off Highway 1.
If you’re looking for an epic 3-day trip spent backcountry camping in Banff, the Skoki Loop should be at the top of your list.
In this post, I’ll share everything you need to know to plan your Skoki Loop adventure, including how to stay safe in the backcountry, the trail experience, what to pack, how to book your campsites and best route options.

Just a heads up: this post contains some affiliate links. If you buy something through them, I might earn a tiny commission (at no extra cost to you). Thanks a bunch for supporting what I do!
Skoki Loop Trail Details: Best of Banff Hiking Trips
Quick Trail Stats:
- Moderate
- ~40km (~25 miles) loop trail
- ~738m (~2421ft) of elevation gain
- 3-4 days to complete
- Lots of side quest hikes to do from campgrounds!
- Well-maintained natural trail
- Dog-friendly! 🐶
- Backcountry campsite reservations required
- Daily vehicle pass required
Quick Trail Tips for Skoki Loop:
- Backcountry Booking Hack
Reservations all booked up? Don’t give up! Tools like Schnerp and Campnab scan for campsite cancellations and help you grab them before anyone else. I used Schnerp to book the Skoki Loop super last-minute, and it ended up being the trip of a lifetime! - Need help reserving campsites?
Don’t worry! I’ve been there too! Booking backcountry reservations through Parks Canada can be a confusing and overwhelming experience. And trying to figure it all out by yourself can be a headache. So I put together a cheatsheet, How to Book Backcountry Camping in Banff Skoki Loop, at the end of this post. - Offline Maps = Backcountry Must-Have
Always, always download offline maps before heading into the backcountry! Having cell service is never guaranteed. I use both AllTrails+ and Gaia GPS for route planning, elevation profiles, and offline use. Pair it with a paper map, and you’re good to go! - Best Time of the Year to Hike Skoki Loop
It’s typically hike-able from early July to early October, depending on snow and weather conditions. We hiked it over the Labour Day long weekend in September, and it was absolutely stunning! Warm days, cooler evenings, wildflowers still blooming and golden larches just starting to turn. Mid-July to early-September is usually your best bet. - Bring Cash!
The Skoki Lodge offers an afternoon tea open to the general backcountry public!
Distances Between Each Campground:
- Fish Creek Trailhead (parking lot) to Hidden Lake Campground: ~7km
- Hidden Lake Campground to Baker Lake Campground: ~6km
- Baker Lake Campground to Red Deer Lakes Campground: ~6km
- Red Deer Lakes Campground to Merlin Meadows Campground: ~5km
- Merlin Meadows Campground to Skoki Lodge: ~1km
- Skoki Lodge to Fish Creek Trailhead (parking lot): ~15km
Backcountry Campground Amenities:
- Designated level spot for your tent
- Water access via lake or river
- Picnic tables
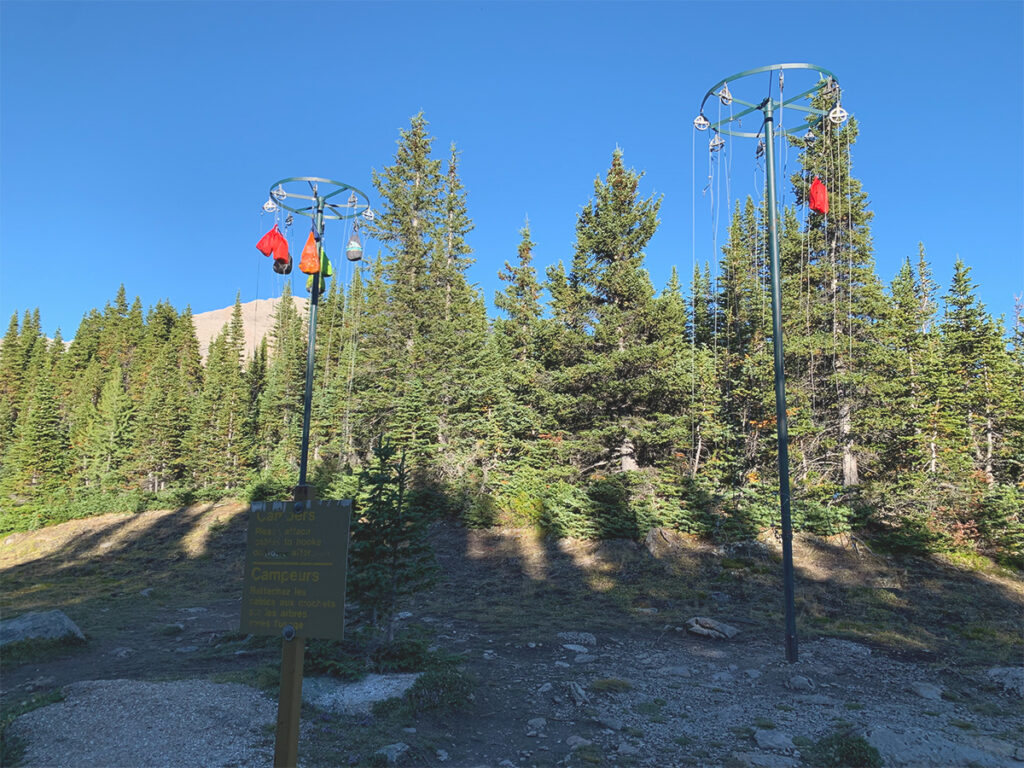
- Hanging bear caches (don’t forget to pack an extra stuff sack to hang up!)
- Pit toilets (always bring your own TP and wet wipes)
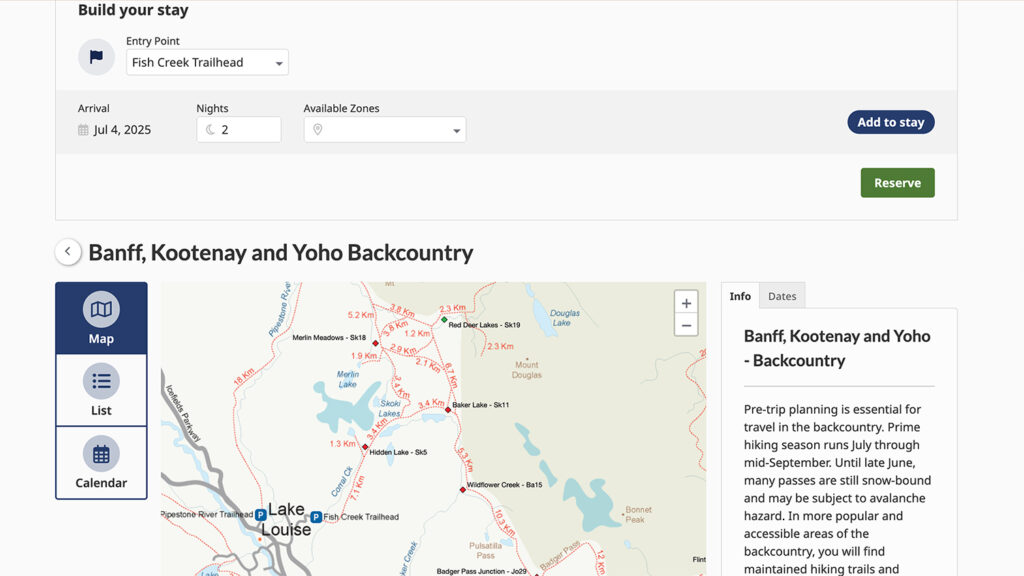
Fish Creek Trailhead Location:
Skoki Loop Trail Map and Elevation Profile:
Backcountry Hiking Tips: Safety, Etiquette & Responsibility
Navigation & Communication
Exploring off-grid is part of the fun, but you must come prepared. I always carry a paper map plus downloaded offline maps through Gaia GPS or AllTrails+ (I love their route planning tools and elevation profiles!).
For backcountry communication, I bring my Zoleo satellite device to send check-in messages or call for help in an emergency. It gives me peace of mind, especially on remote trails.
Bear Safety
Seeing bears is both exhilarating and slightly terrifying depending on where you see them. From your car: exhilarating, amazing, 10/10! But from the trail, it can be a little scary.
While bear encounters are relatively rare, it’s crucial to prepare yourself by learning to identify grizzly vs. black bears, minimize your chances of encounters, and react safely if do have an encounter and always carry (and know how to use) bear deterrents.
Check out my post 5 Essential Bear Safety Tips You Need to Know to learn more!
Leave No Trace
Just like that old saying goes, “Take nothing but pictures and leave nothing but footprints!”. Practice responsible hiking by carrying out all of your trash (including stranger’s garbage and/or your dog’s waste!), staying on designated trails, and respecting wildlife and plants!
As wandering nature nerds, we want to leave the land better than we found it.
Want to know more about what it means to leave no trace? Check out my post 7 Ways to Leave No Trace When Exploring the Great Outdoors.
Backpacking in Banff: The Skoki Loop Experience
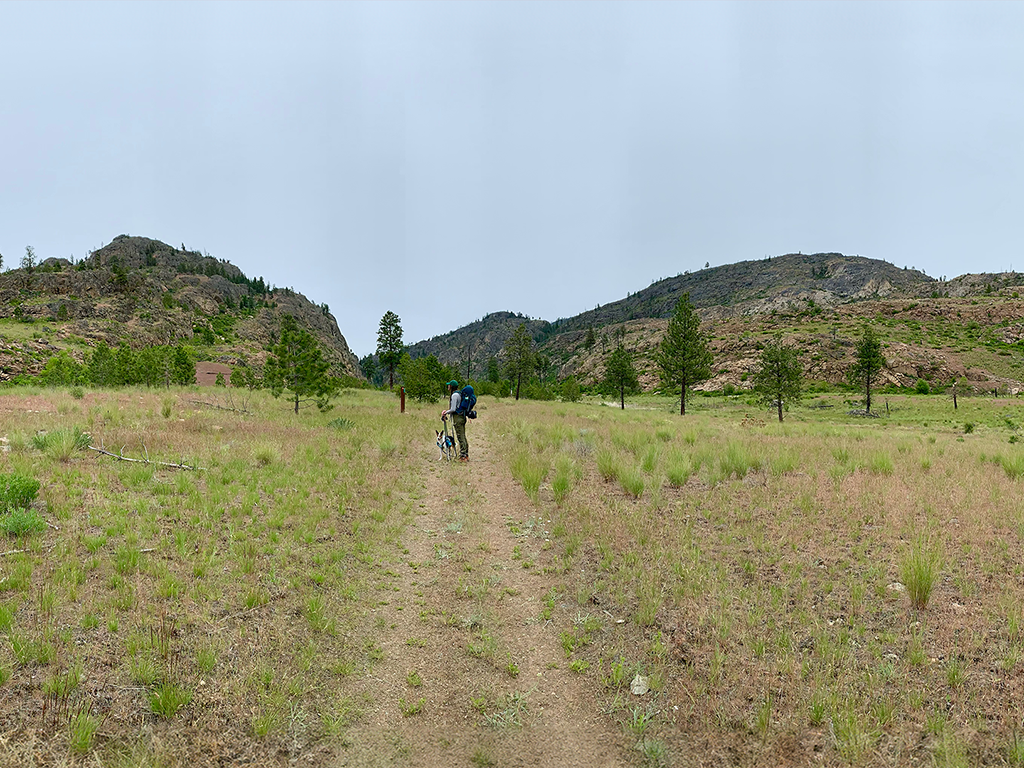
Day 1 : Starting at Fish Creek Trailhead
We drove in from the Okanagan area, so to break-up our driving time (of ~5hrs) we car camped the night before at a BC Recreation Site just outside of Golden. It was off Highway 1 near the tiny hamlet of Donald, where a short drive up a Forest Service Road (a.k.a an FSR) leads to two convenient rec sites: Bluewater Creek Recreation Site and Bluewater Bridge Recreation Site. Perfect for a quick overnight stop on your way to the trailhead. If you’re making a long drive to start the Skoki Loop, I highly recommend this tactic to break up the travel and start your hike feeling rested.
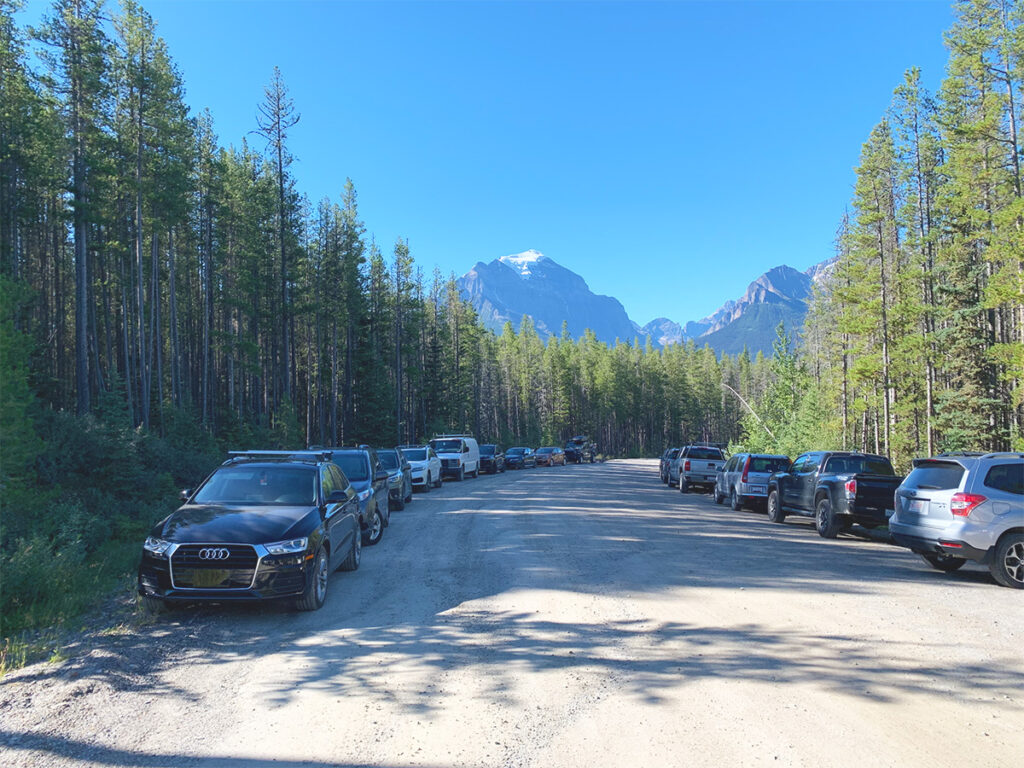
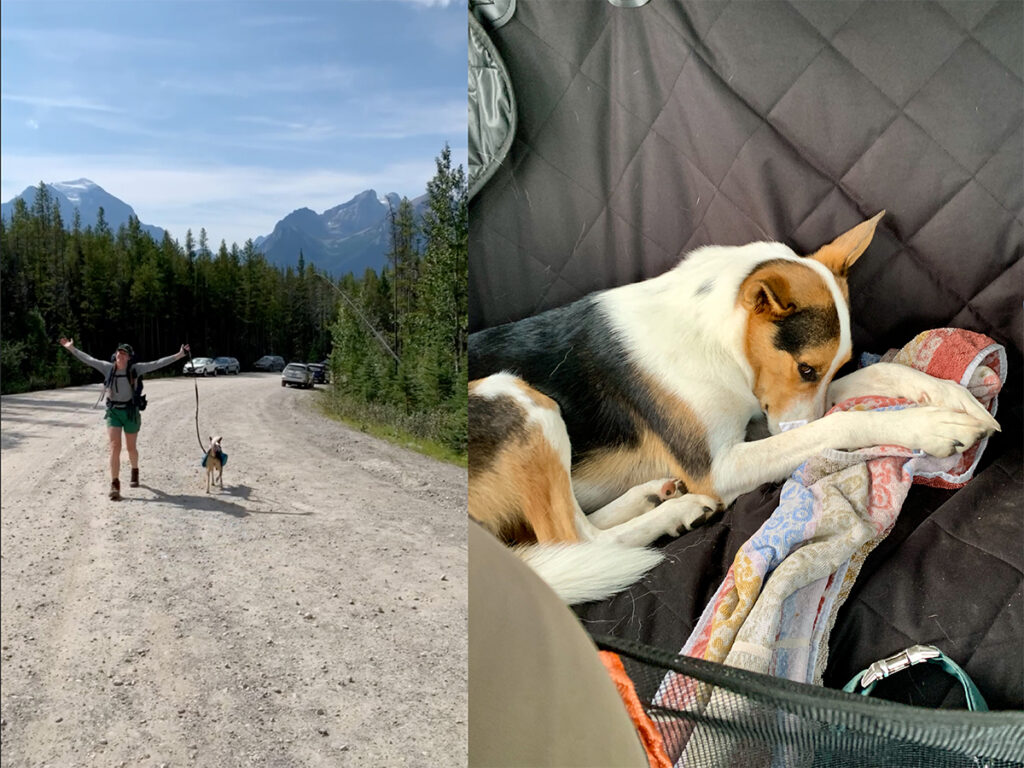
Once we entered Banff National Park, we stopped at the Lake Louise Visitor Centre to grab our daily vehicle pass. This took way longer than expected—turns out I completely forgot it was the long weekend (I know, I know… rookie move!). The town centre was a bit of a zoo. But once we had our pass, it was a quick drive to the trailhead. We found parking along the dirt road and started getting our packs on!
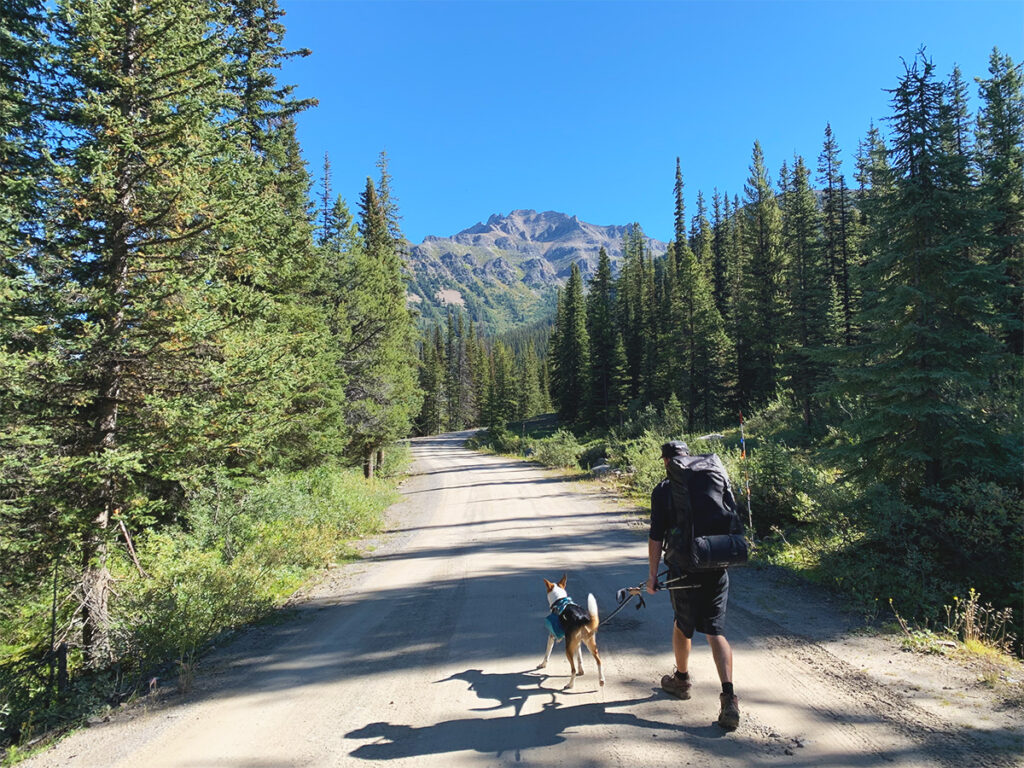
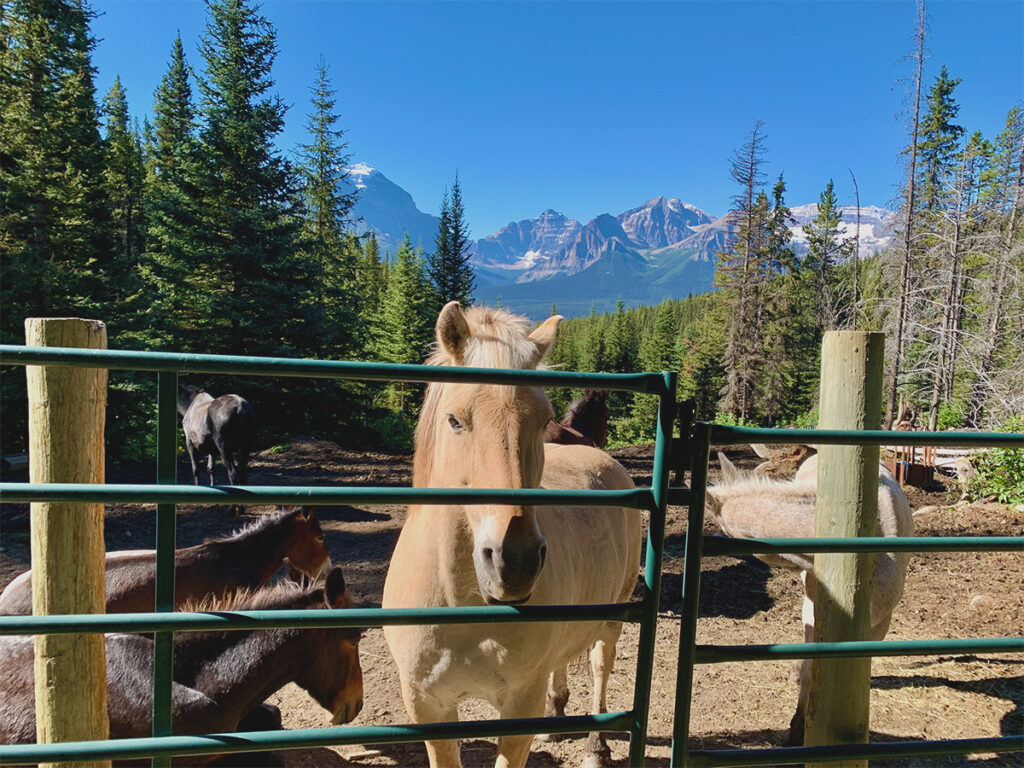
The first 4 km of the trail follow a dirt service road, used by maintenance crews, horse wranglers for a local guide company, and the Skoki Lodge shuttle. If you’re lucky, a vehicle might pass by and give you a lift to the official trailhead. Worth a shot if you’re trying to save some energy! We walked the full length of the road, and while it was a bit uneventful, I didn’t mind as it gave me a chance to stop at the corral and say hello to the horses and mules along the way.
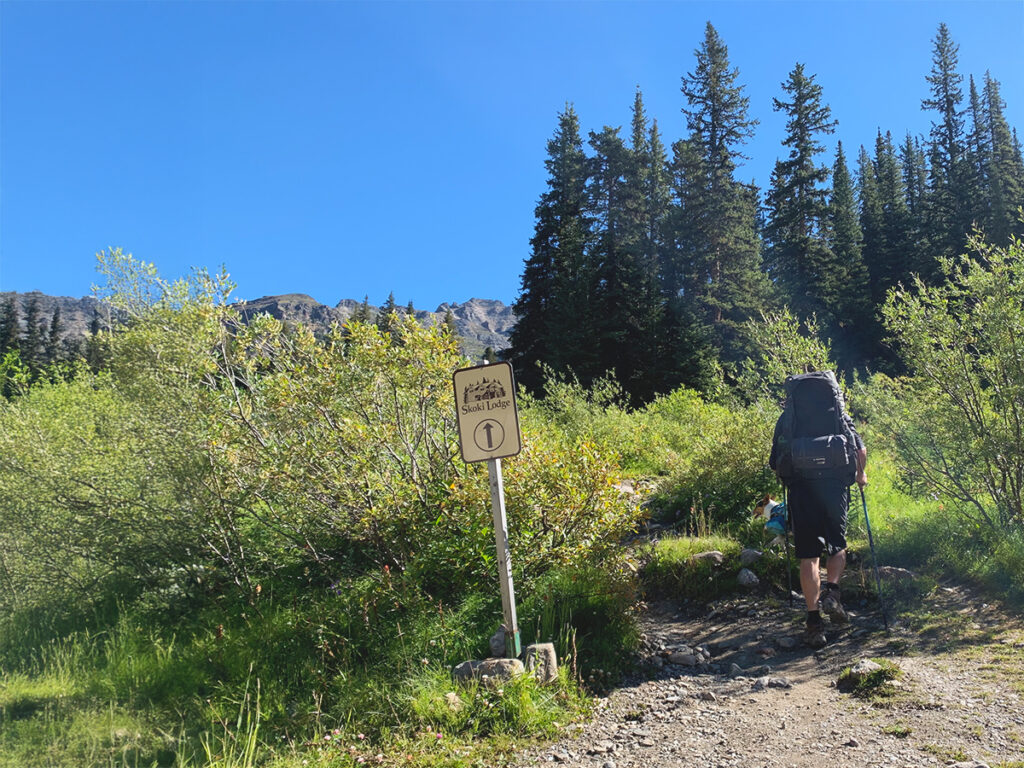
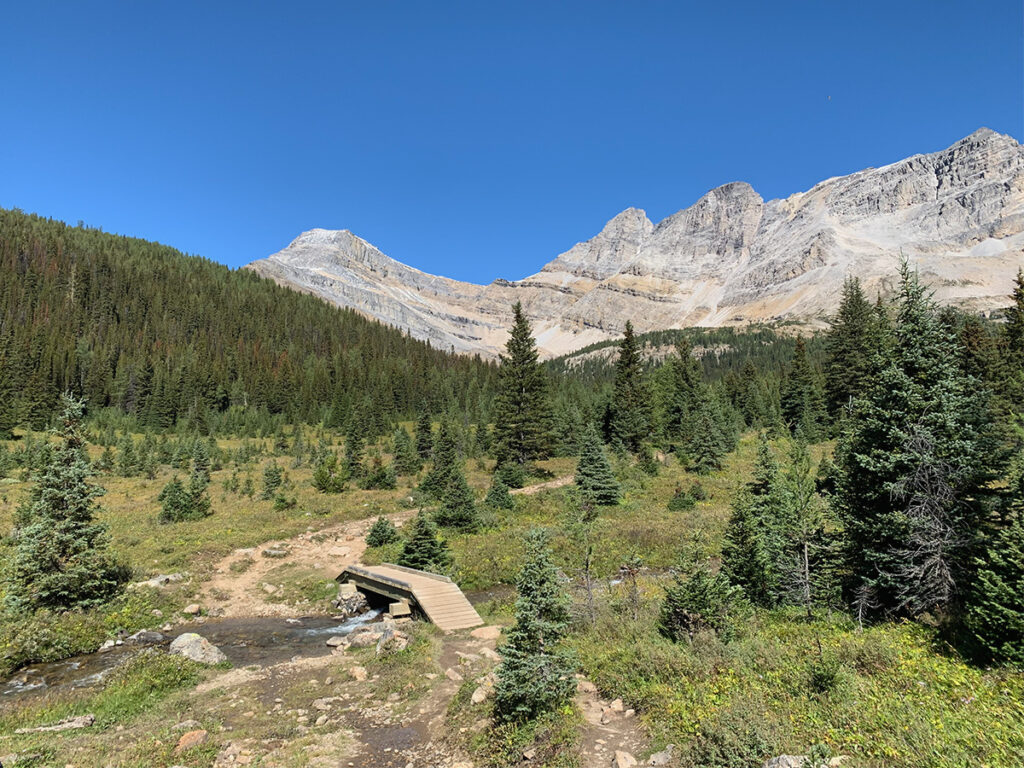
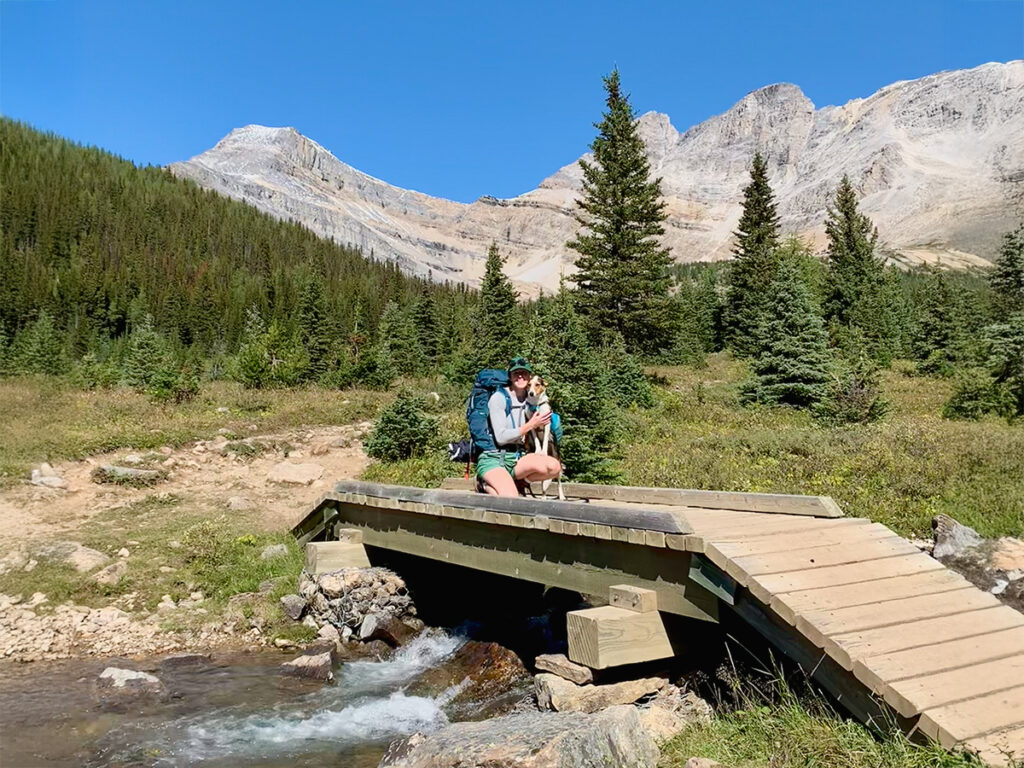
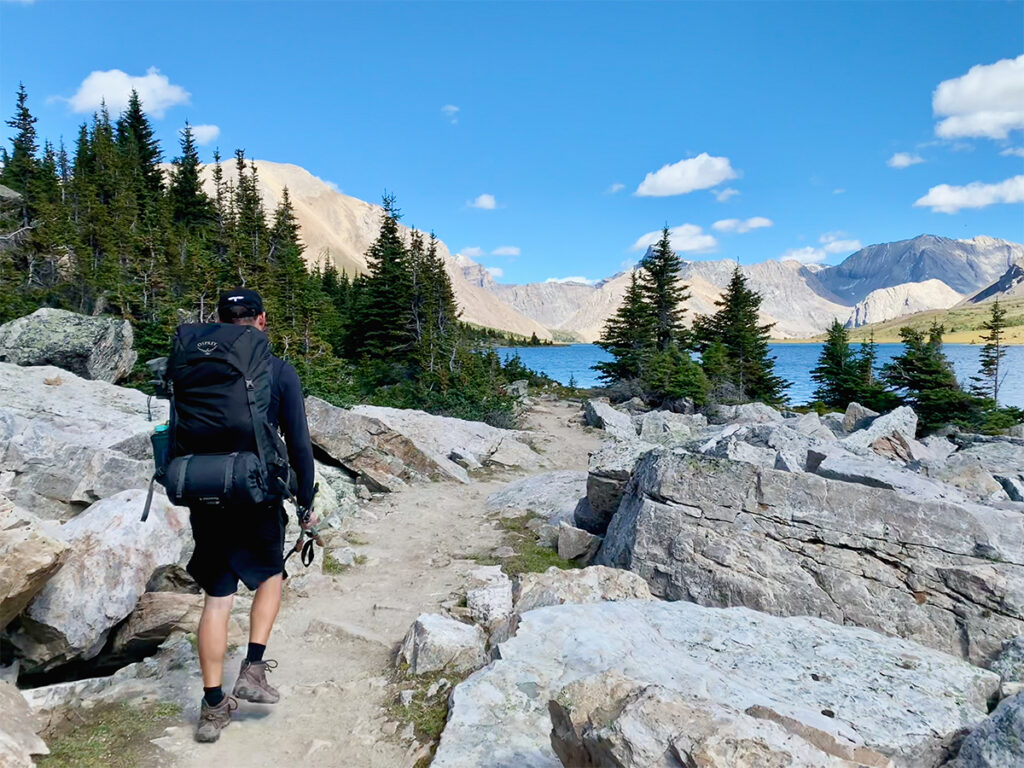
Once you leave the dirt service road and step onto the official hiking trail, the forest quickly opens up, revealing those classic, sweeping Rocky Mountain views that Banff is so well known for! At around 6.4 km in, you’ll cross Corral Creek via a charming wooden bridge. I have such a soft spot for rustic backcountry bridges! There’s just something magical about them!
About 0.5 km past the creek crossing, you’ll arrive at Halfway Hut and the turnoff for Hidden Lake Campground. If you have a bit more time and want to stretch the Skoki Loop into a 3-night, 4-day adventure, Hidden Lake makes a great option for your first night.
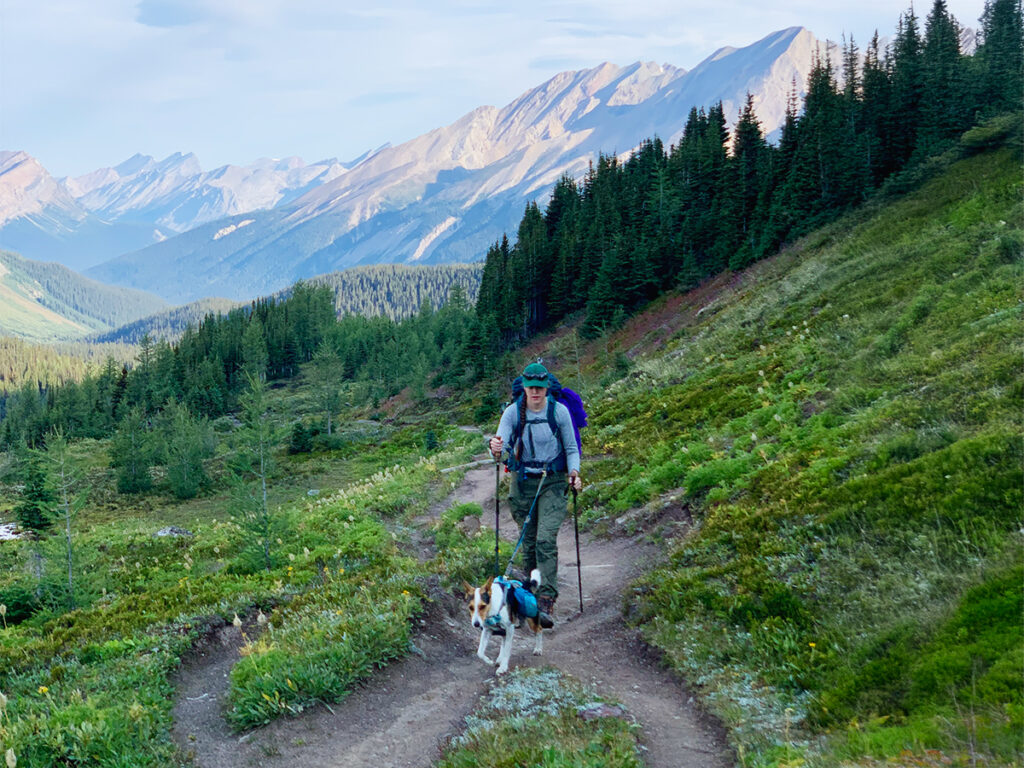
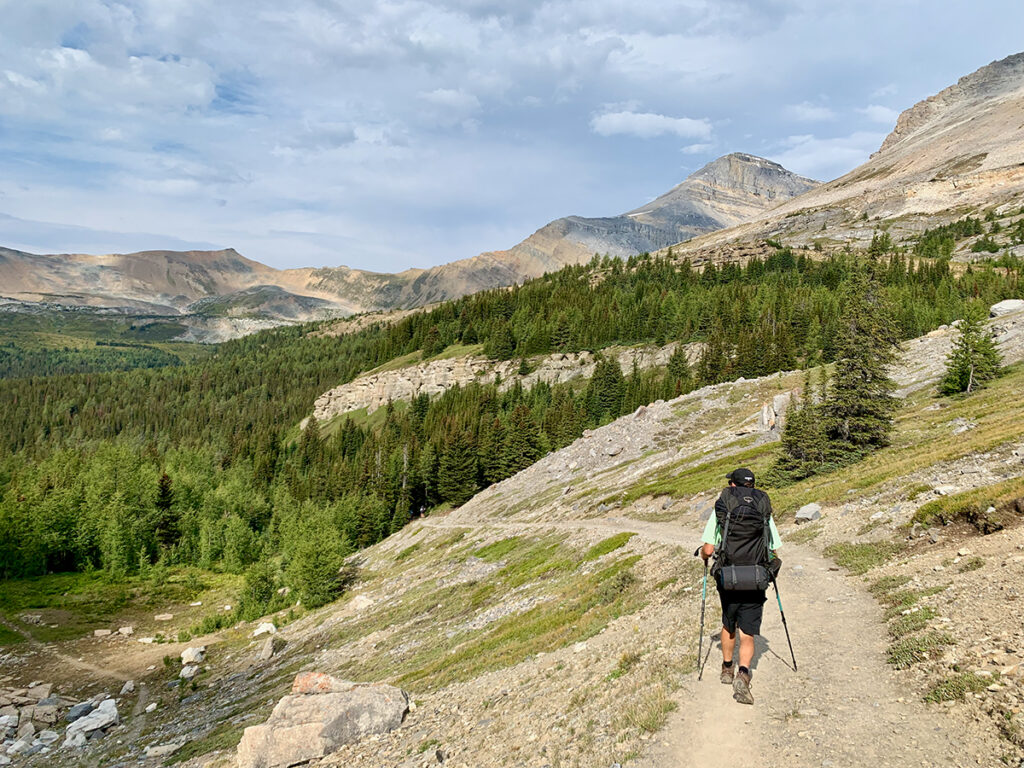
Day 1: Entering the Boulder Pass!
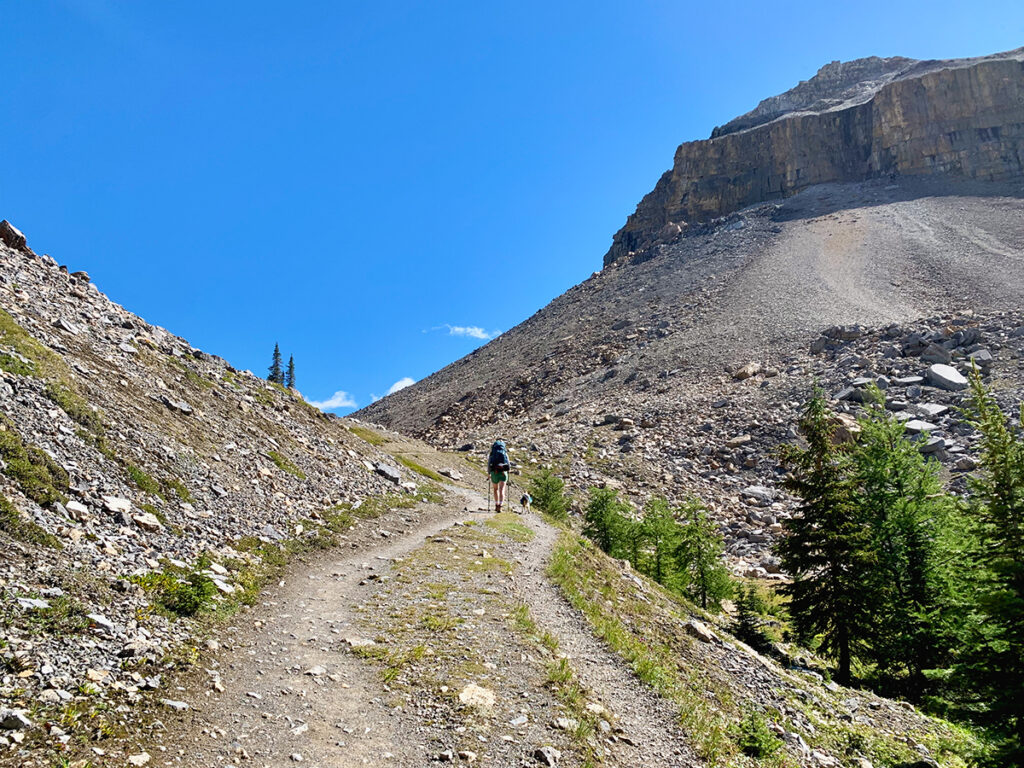
Just after passing the turnoff for Hidden Lake Campground, you’ll begin the climb up Boulder Pass, your first major ascent of the hike! It’s a beautiful section, and as far as mountain passes go, this one is relatively gentle as it’s only ~1.6km until the top of the pass.
Once we crested the pass and slightly dropped into the next valley, the wind definitely picked up. If the weather hadn’t been so perfect, I would’ve needed to throw on an extra layer. The trail is very exposed, which means you’ll not only feel the wind, but also the sun! We found ourselves reapplying sunscreen pretty frequently.
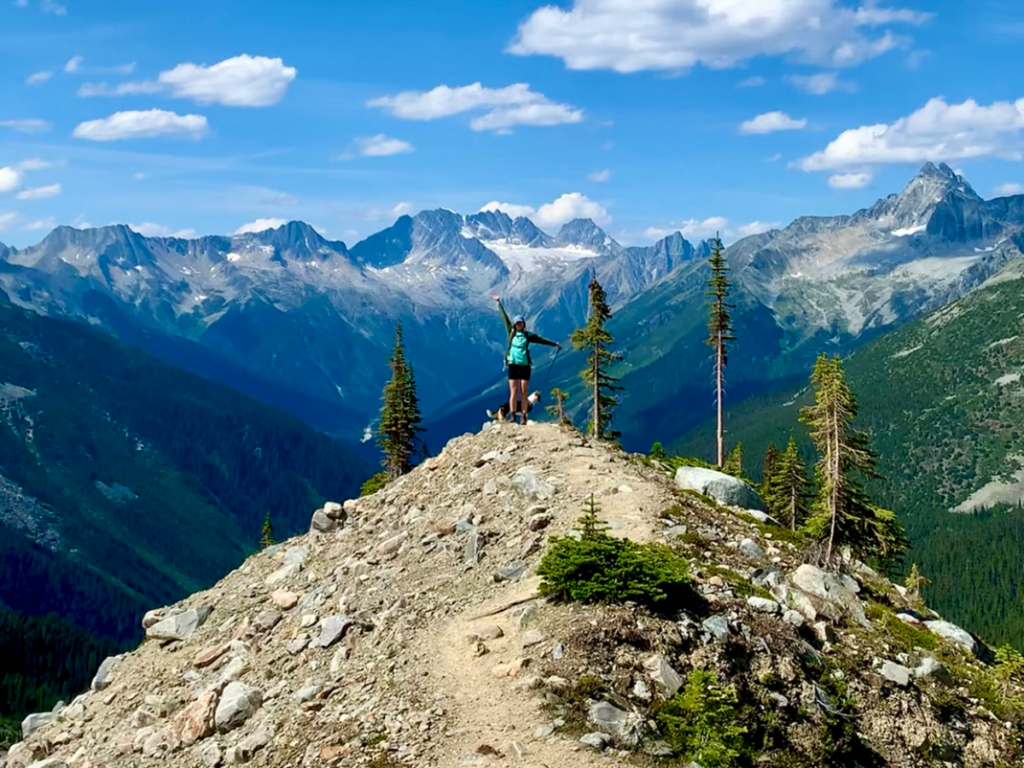
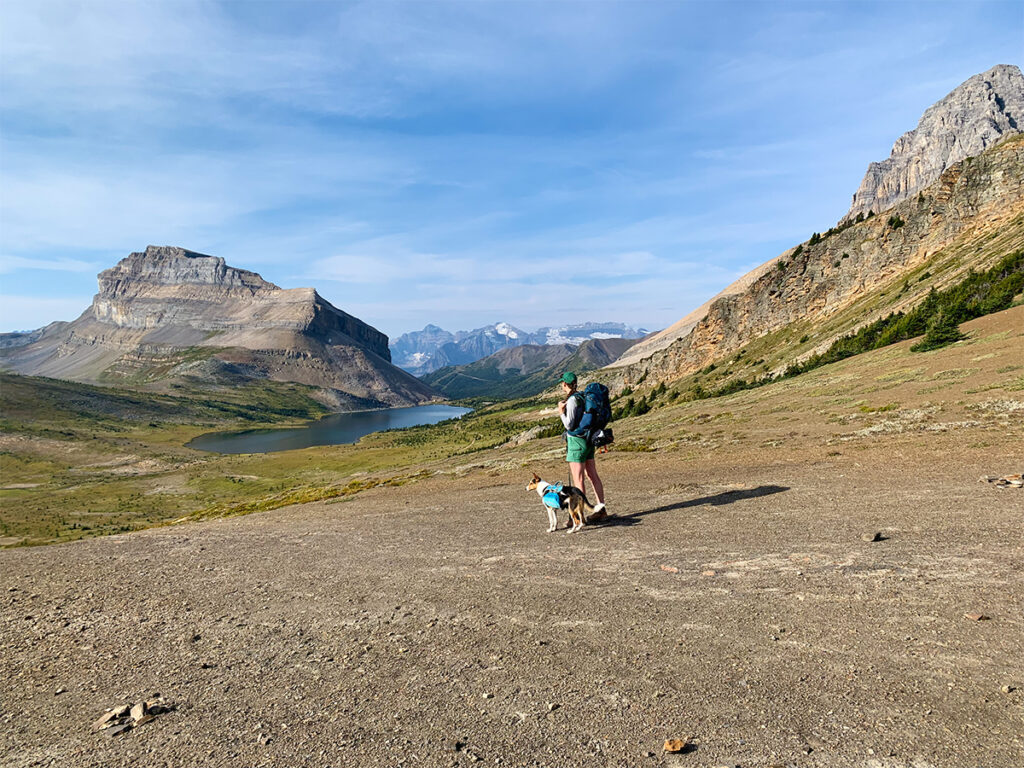
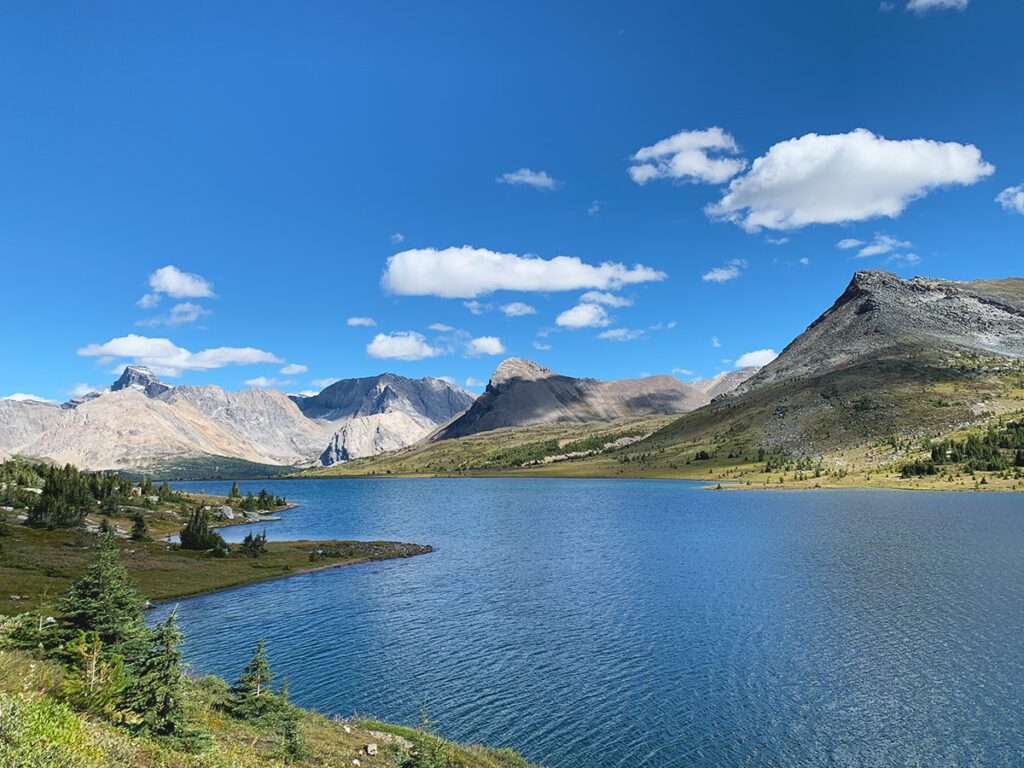
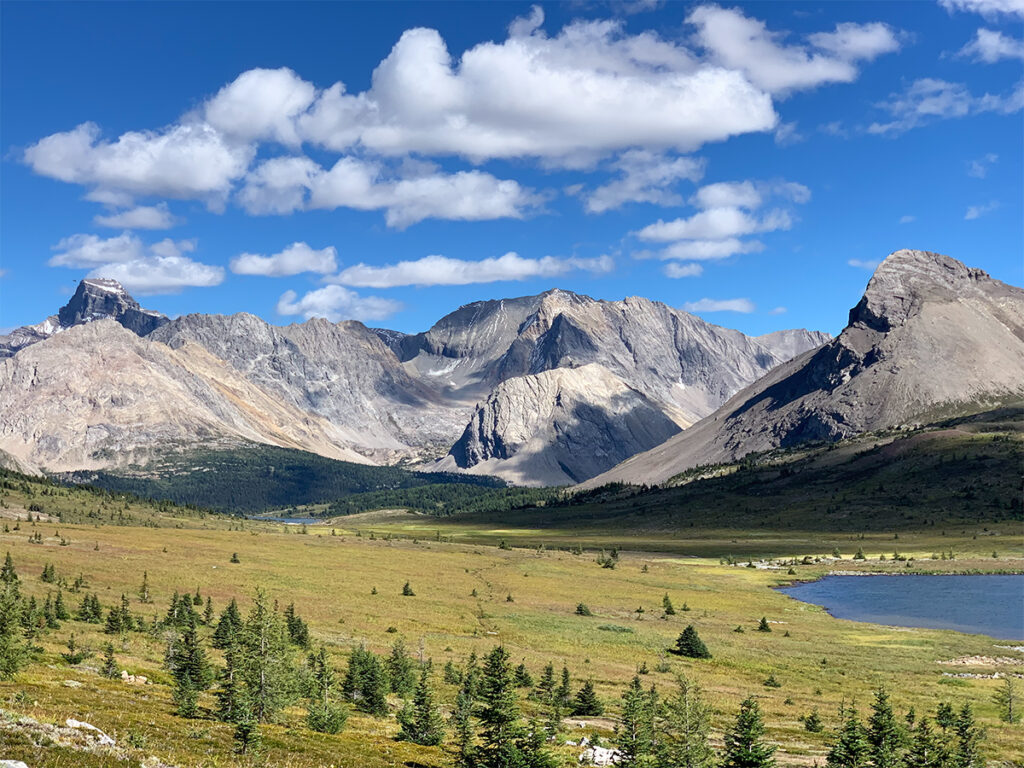
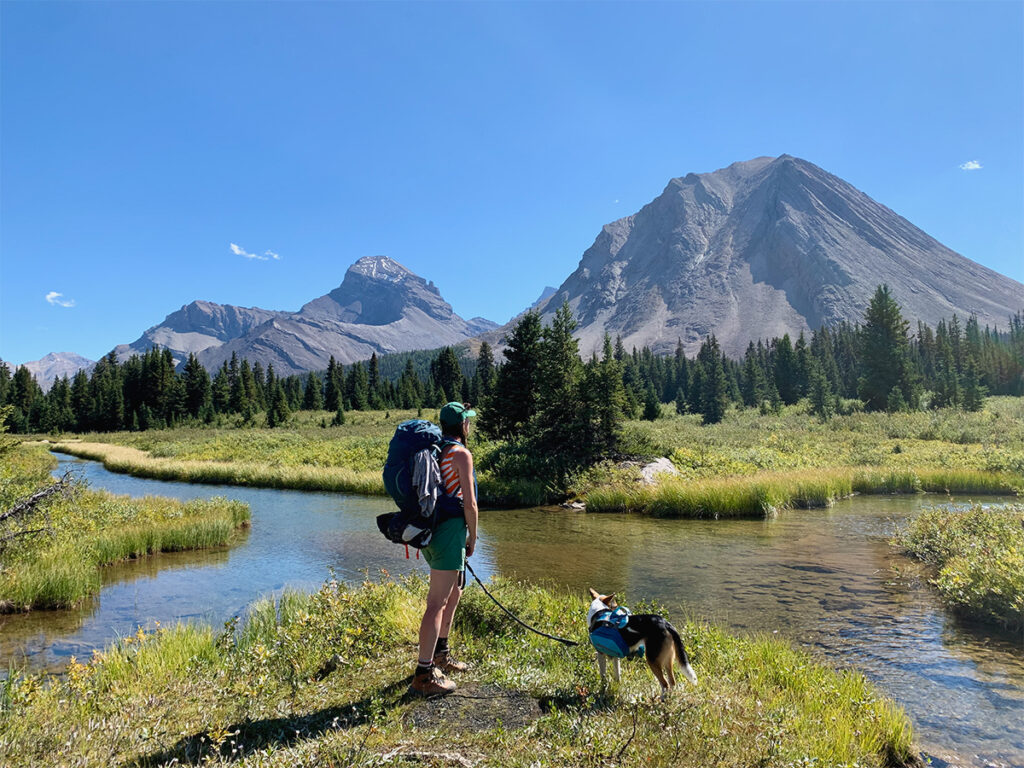
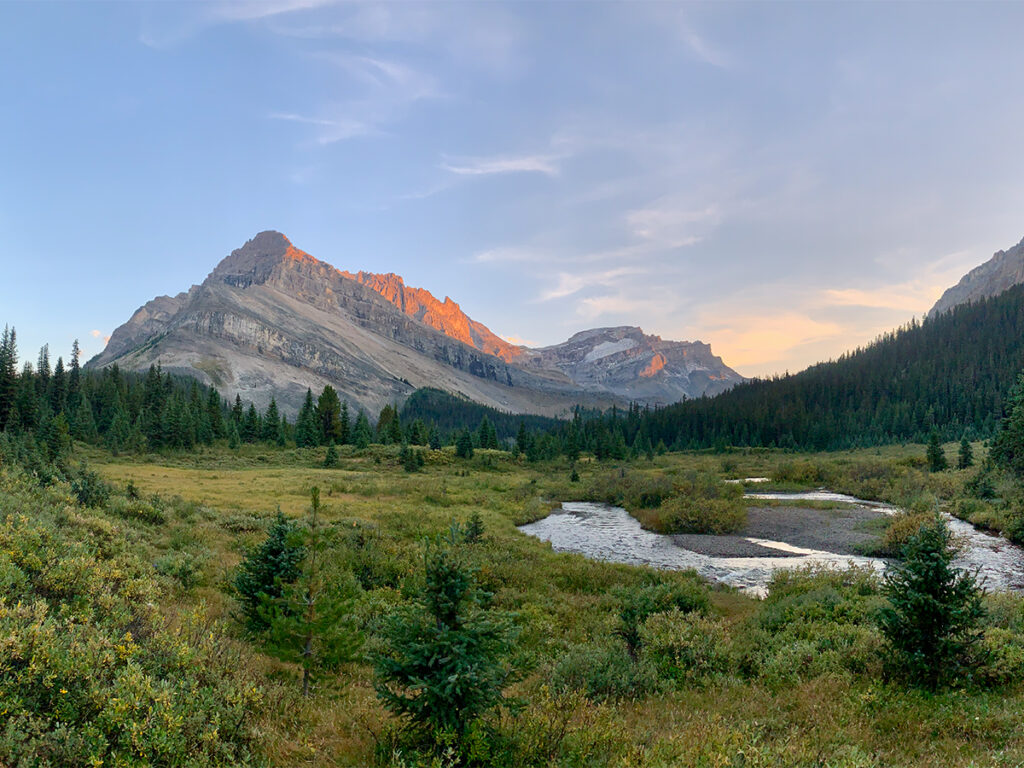
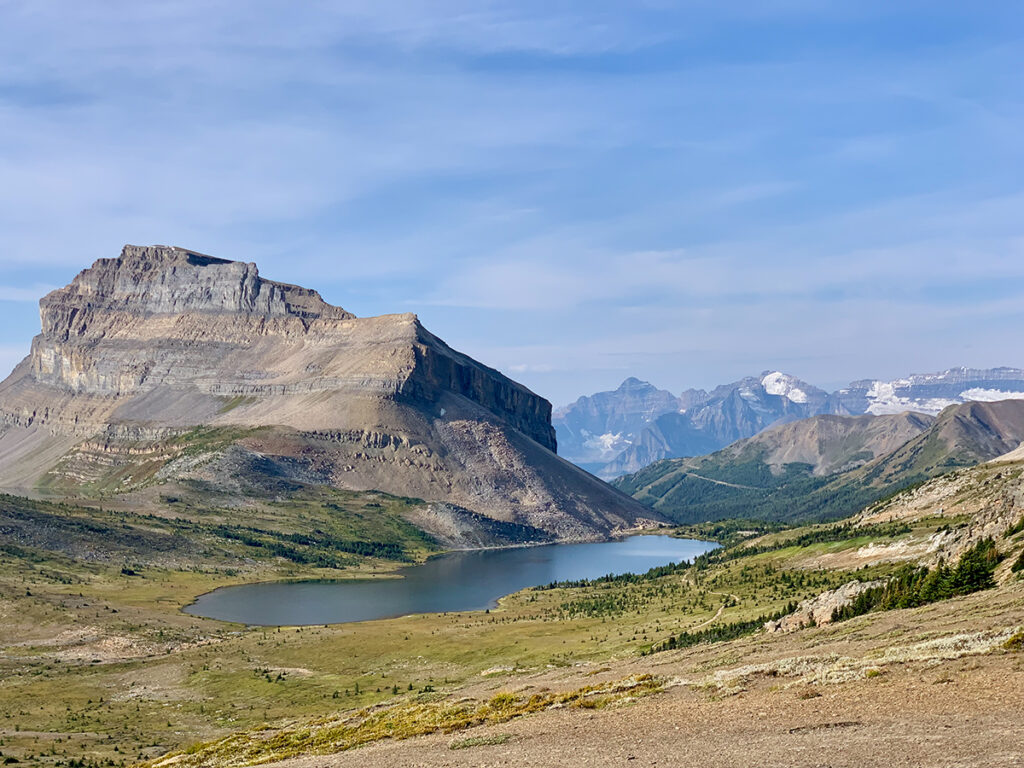
As you round the bend of Boulder Pass, you’re rewarded with your first jaw-dropping view of Ptarmigan Lake. Be sure to stop and take it all in! It’s absolutely stunning!
Day 1: Ptarmigan Lake
Ptarmigan Lake is a popular turnaround point for many day hikers, so the trail tends to be fairly busy up until this spot. But once you pass the south end of the lake, you’ll notice the crowds thin out, and you’ll be rewarded with a bit more solitude.
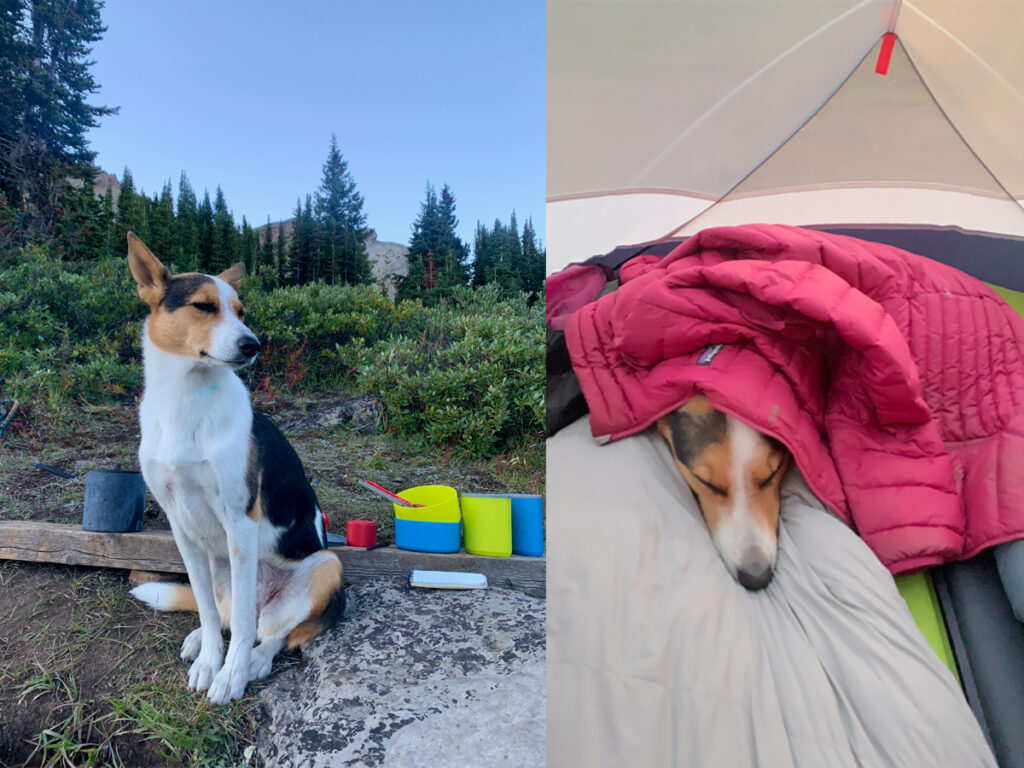
Many hikers stop at the southern shore for a lunch or water break before heading back or continuing their backpacking journey. Since my dog Ziggy can be a little territorial and reactive around other dogs (especially in unfamiliar places), we opted to take our break a bit farther up the trail along the lakeshore.
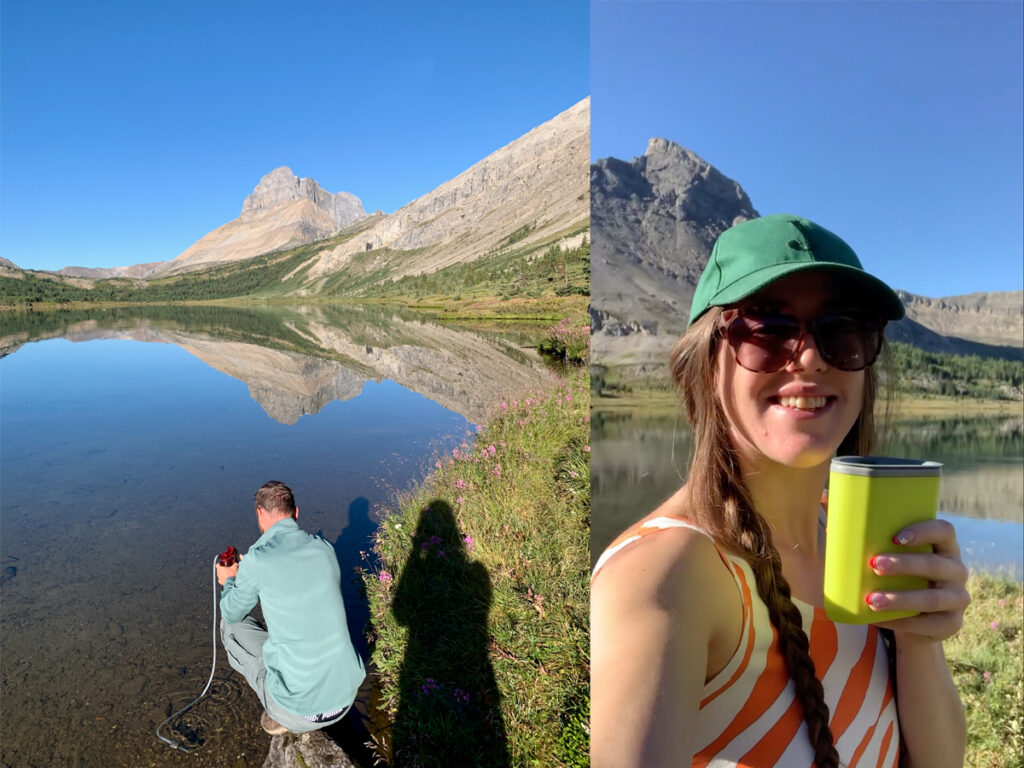
We kicked off our boots and dipped our feet into the icy-cold water, filtered some more drinking water, and soaked up the incredible views. We even watched a few hopeful fisherman trying their luck at catching dinner! The lakes up here are home to both Cutthroat and Brook Trout.
After our lunch break along Ptarmigan Lake, we hopped back on the trail toward Baker Lake Campground. The Skoki Loop can be hiked in either direction, but we went counter-clockwise. Mainly because that’s what worked with our campground reservations that we booked via Schnerp.
The trail follows the shoreline of Ptarmigan Lake for about a kilometre, leading through a rocky section that can be a little tricky to navigate. My downloaded AllTrails+ map came in super handy here and helped us stay on track. We even ended up helping another group of hikers who had taken a wrong turn get back on the right path.
After the rocky outcrop, the trail climbs slightly, offering fresh views of the valley and surrounding peaks from a new perspective. Even in early September, we were still treated to wildflowers like fireweed and Indian paintbrush that were still in bloom!
At around the 10 km mark, you’ll reach a clearly marked Y-junction with a sign pointing out the different trail directions. To get to Baker Lake Campground, stick to the right. This is also the point where the loop reconnects, taking the left fork would lead you toward Skoki Lodge and Merlin Meadows Campground.


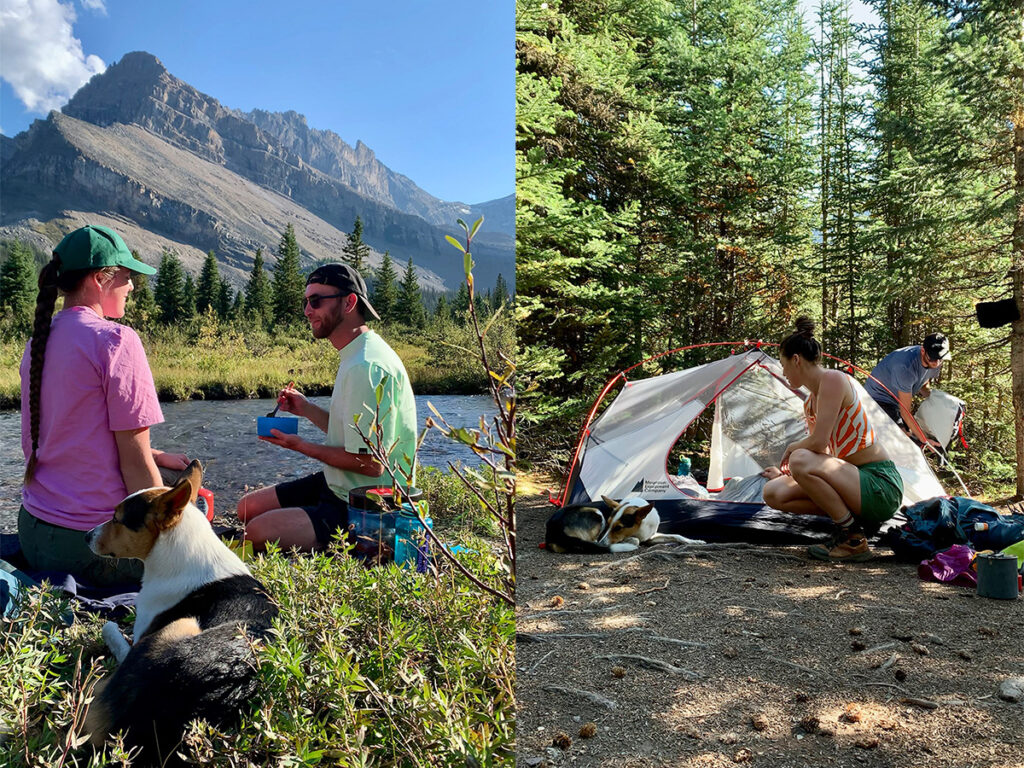
Day 1: Baker Lake Campground
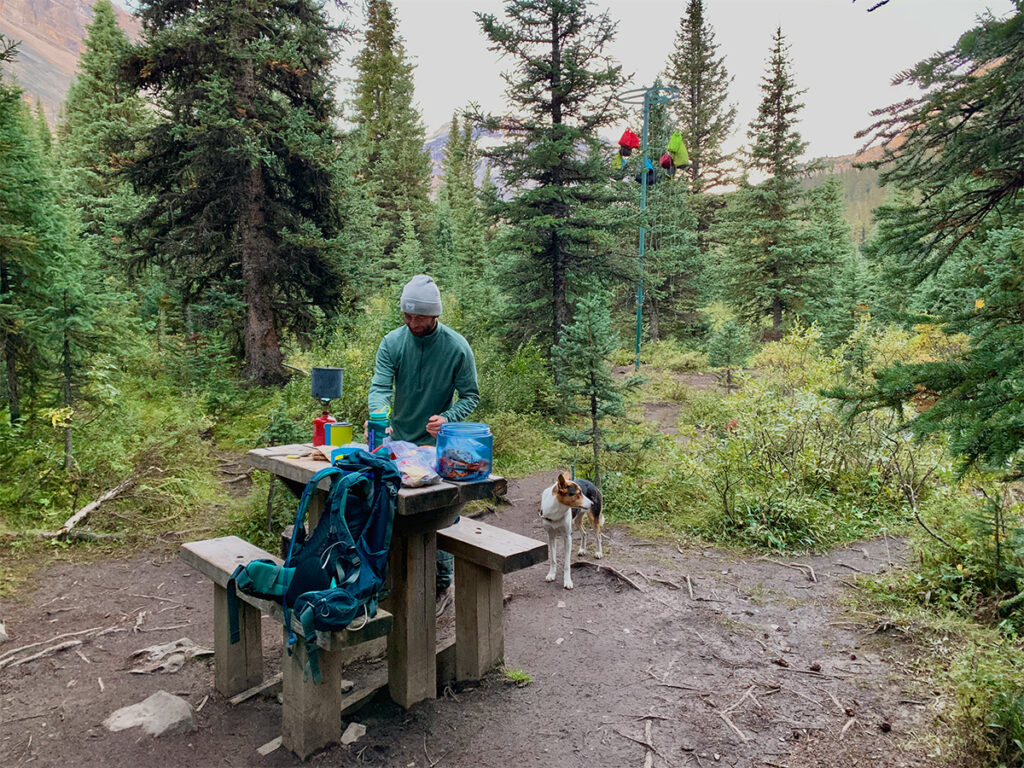
Night one was spent at Baker Lake Campground, located ~13km from the trailhead. While the campground itself isn’t particularly scenic (it’s tucked into the forest and can likely get buggy in the peak of summer or muddy if it rains) it’s still a solid spot to spend the night. It’s well maintained, with a clean food prep and eating area, plus brand new outhouses (as of September 2024!).
Pro tip: always bring your own toilet paper, wet wipes, hand sanitizer, and/or soap.
There’s also a bear cache for safely storing food and anything scented. I totally forgot to check what kind of bear cache system was provided, so we didn’t bring an extra dry sack for hanging. We usually use a BearVault, but this time we ended up hanging everything—including the BearVault—inside one of our backpacks.
The campsites are quite close together with minimal privacy, but let’s be real, that’s not what we came for. We came for the hiking, the fresh air, the wildflowers and the mountain views! And just a few steps from camp, you’ll find plenty of those.
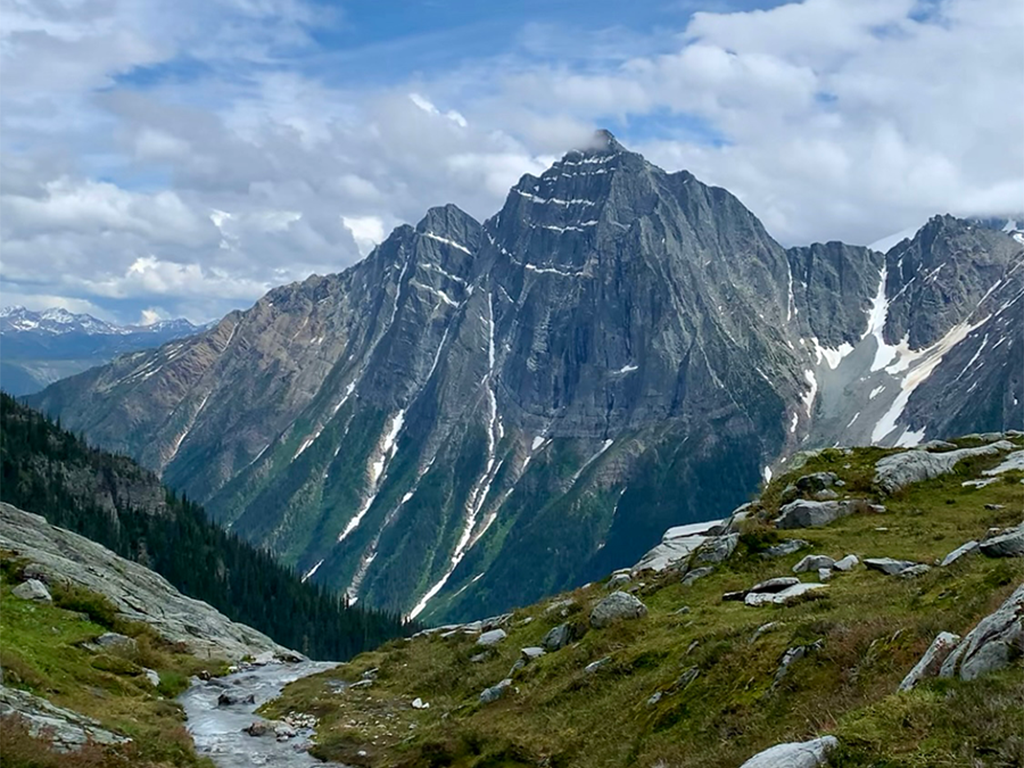
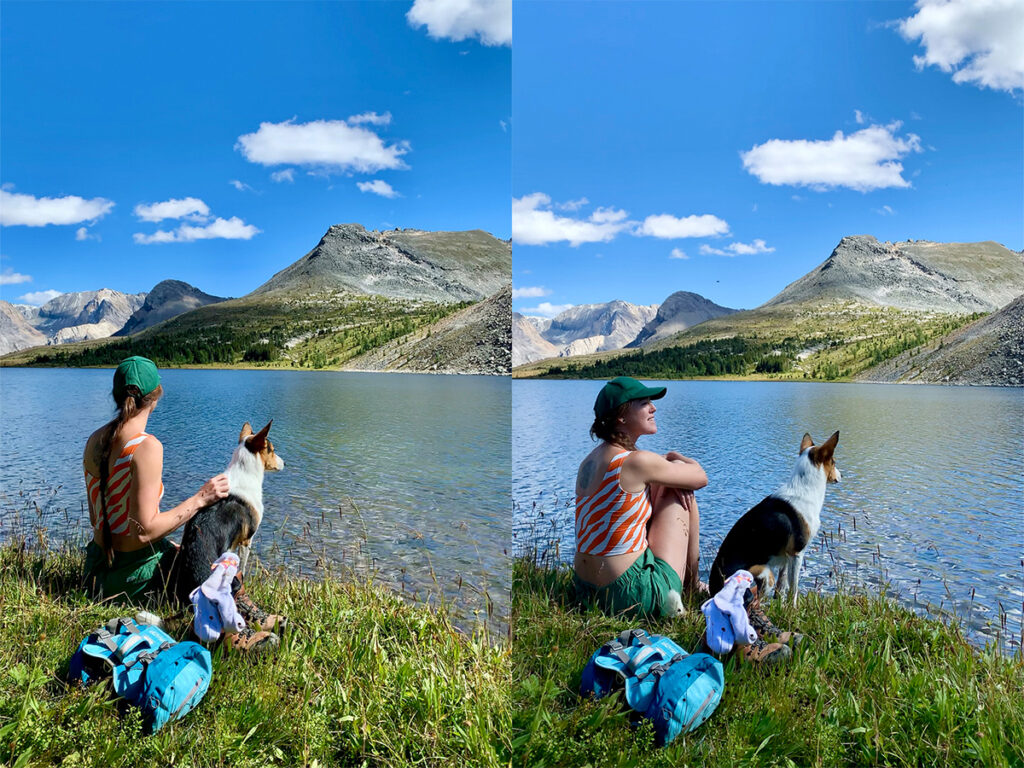
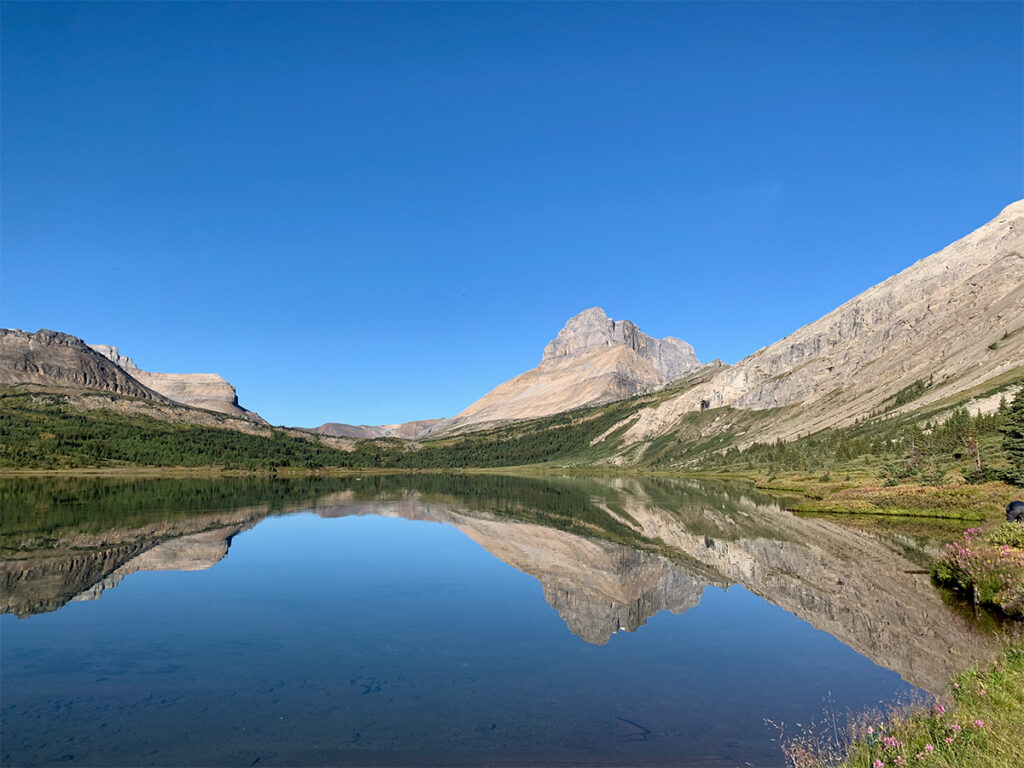
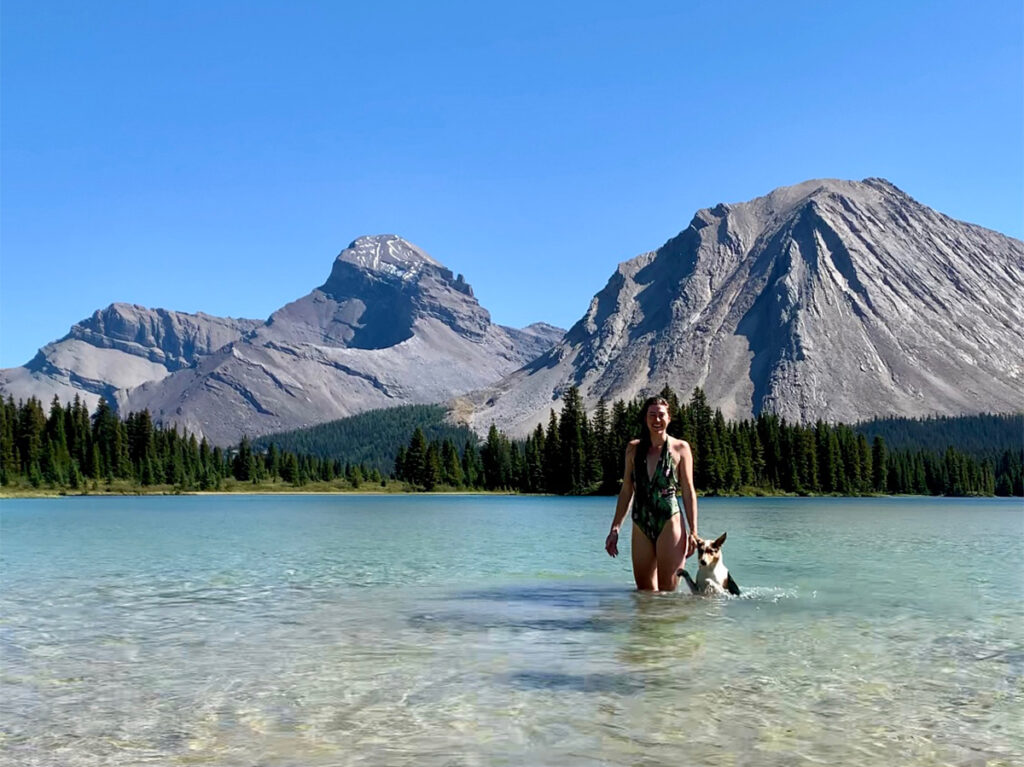
Baker Lake itself is beautiful, with a stunning view of Brachiopod Mountain from the shoreline. We took a quick dip in the lake, but fair warning, it’s very shallow! You’ll probably end up doing a silly flop followed by a brief, freezing doggy paddle before sprinting out to warm up. Worth it, though!
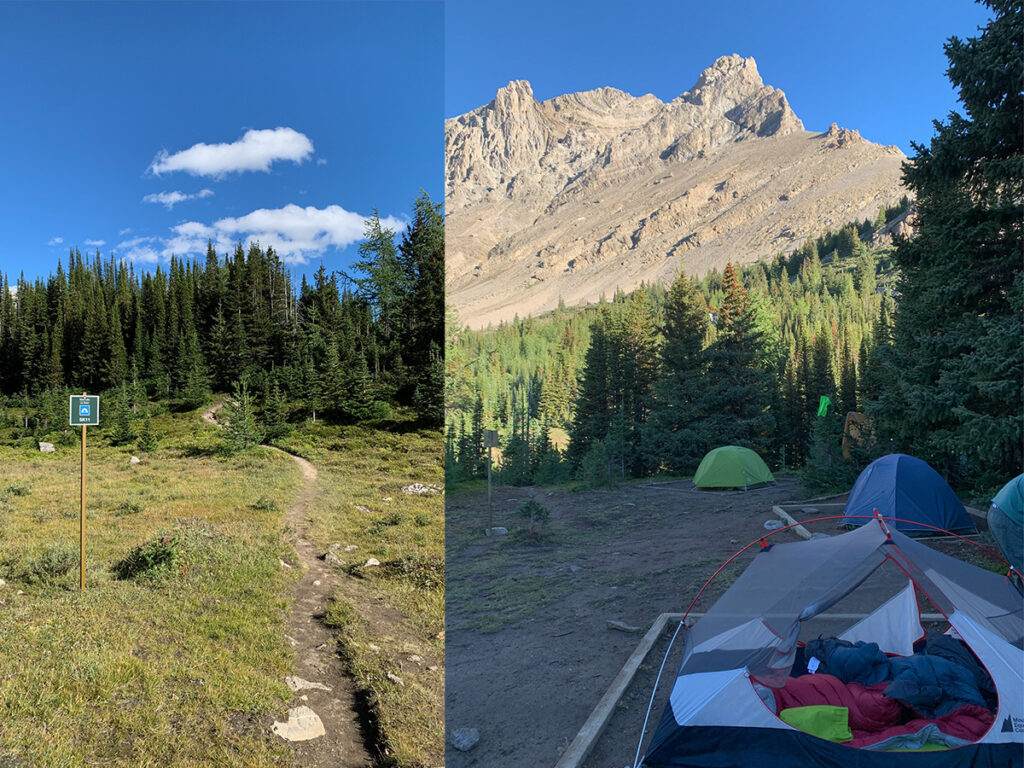
Arriving at Baker Lake Campground! The tent pads are so close together that there isn’t much privacy, but the views from the lake make up for it!
Day 2: Baker Lake Campground to Red Deer Lakes
On night one, we slept with the fly off our tent because the sky was so clear and the stars were absolutely stunning! It was definitely chilly, though. If you’re hiking in late summer, don’t let the warm daytime temps fool you, nights in the mountains can still get cold.
We had a slow, easy morning since we knew our hiking day was going to be fairly relaxed. The sky was crystal clear again, and honestly, it might’ve been the most beautiful backcountry morning I’ve ever experienced. I’m so glad we took our time and soaked it all in.

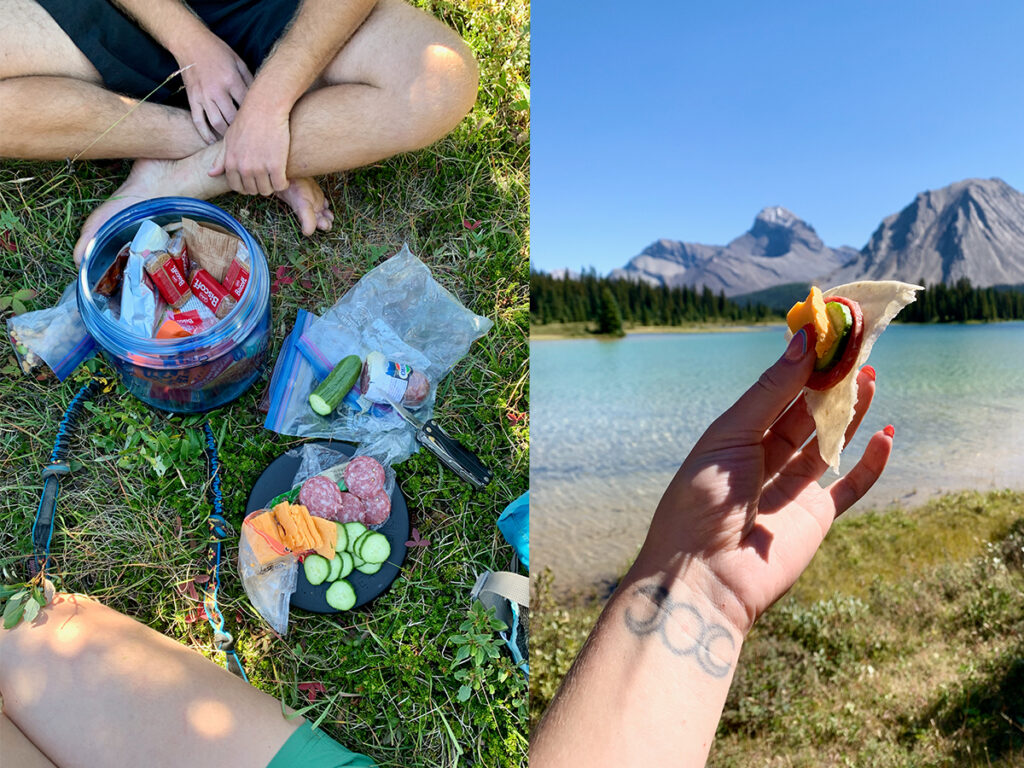
About 2 km passed Red Deer Lakes Campground, we stopped for a lunch break. It was just too beautiful not to. We ate, went for a quick swim, and really leaned into the whole “slow adventure” vibe.
That said, because we took our time hanging out, we ended up missing afternoon tea at Skoki Lodge (which we’d originally planned to check out!). The lodge sometimes offers tea and snacks for non-guest hikers and campers from 2–4 pm, depending on availability, but we didn’t quite make it in time. Oh well, maybe next time!
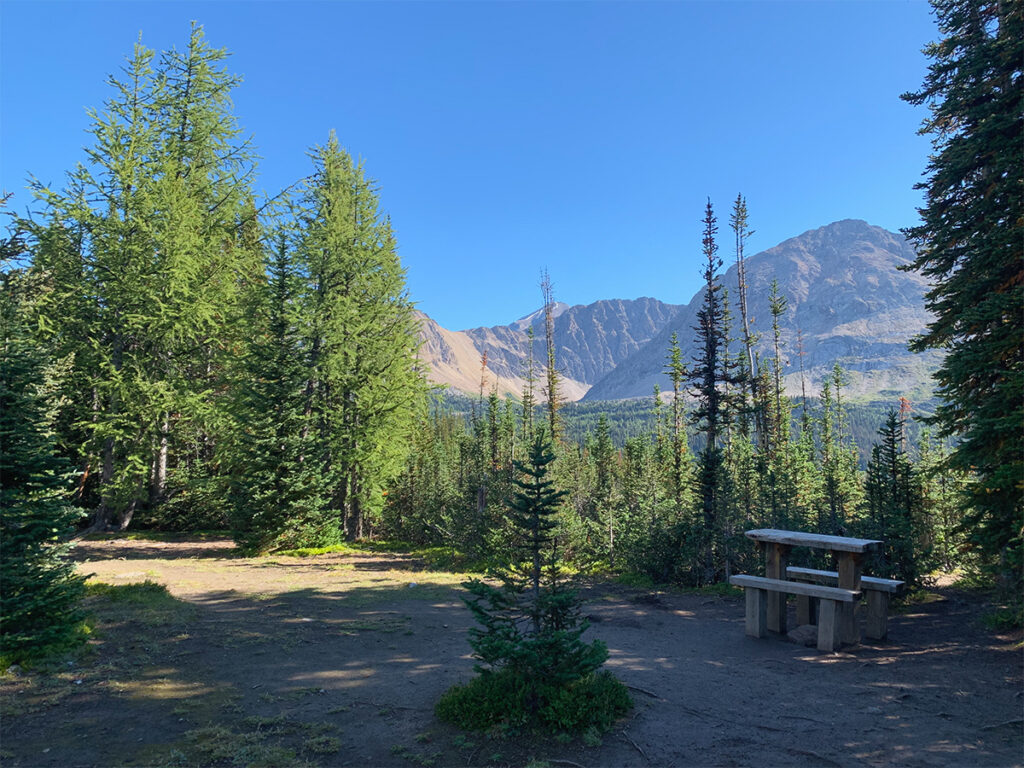
Day 2: Merlin Meadows Campground
Arriving at Merlin Meadows Campground from our lunch break spot was definitely a bit confusing. Once again, I was so glad to have my downloaded AllTrails+ map. It made navigating much easier. As you approach the area, there’s another horse corral, and the trails begin to braid and split off in multiple directions. Staying on the correct path to Merlin Meadows took some attention.
Compared to Baker Lake Campground, Merlin Meadows felt much more private, which I really appreciated. It doesn’t have designated tent pads like Baker Lake, but there are obvious cleared, flat areas meant for tents. The campground is quite a bit larger and also features a designated food prep and eating area, a hanging bear cache system, and outhouses. Although these ones are older and not freshly built.
Pro tip reminder: always bring your own toilet paper, wet wipes, hand sanitizer, and/or soap.

Because we’d had such a relaxed, slow-paced hiking day, we skipped the side quest to Merlin Lake. And honestly, that was totally okay. We both work physically demanding jobs and were feeling pretty drained. This trip was more of a restorative getaway than a high-mileage adventure. Still, we definitely want to come back and explore more of the area. Every single hiker and Skoki Lodge guest we spoke with said Merlin Lake is absolutely worth the extra effort!
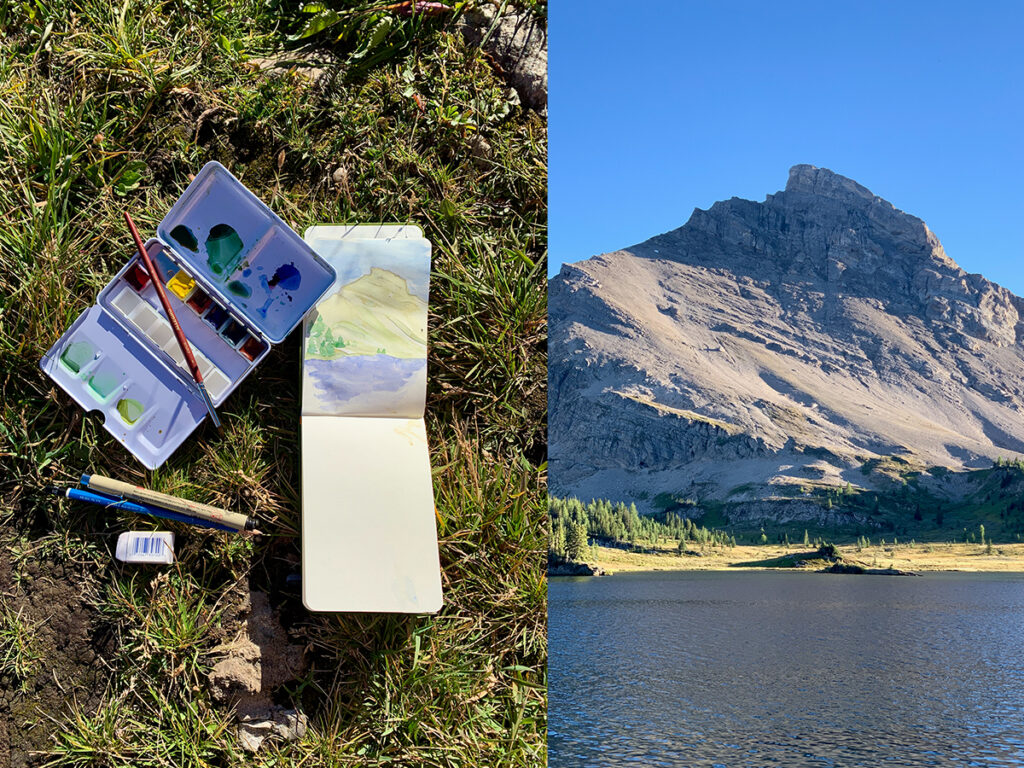
Instead of pushing for more distance, we spent the evening hanging out by the river, watching the sunset, painting, and reading. It was the perfect way to wind down before crawling into our tent for some rest, as we had an early morning ahead to hike out.
Day 3: Packing Up & Passing Skoki Lodge
We woke up super early to get a head start on our final—and longest—day. We had just over 15 km to hike out, followed by a 5-hour drive home. But that quiet, early morning was totally worth it. There’s something magical about sipping hot coffee (even if it’s instant, from a questionably clean camp mug) while watching the first light hit the surrounding mountain peaks.
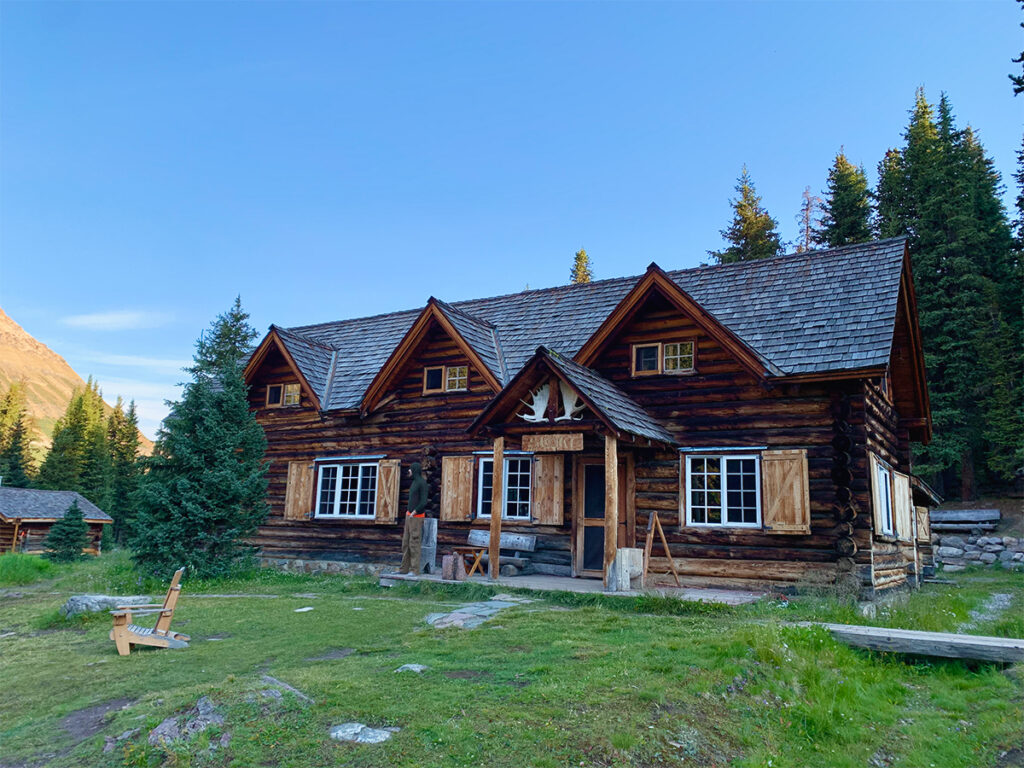
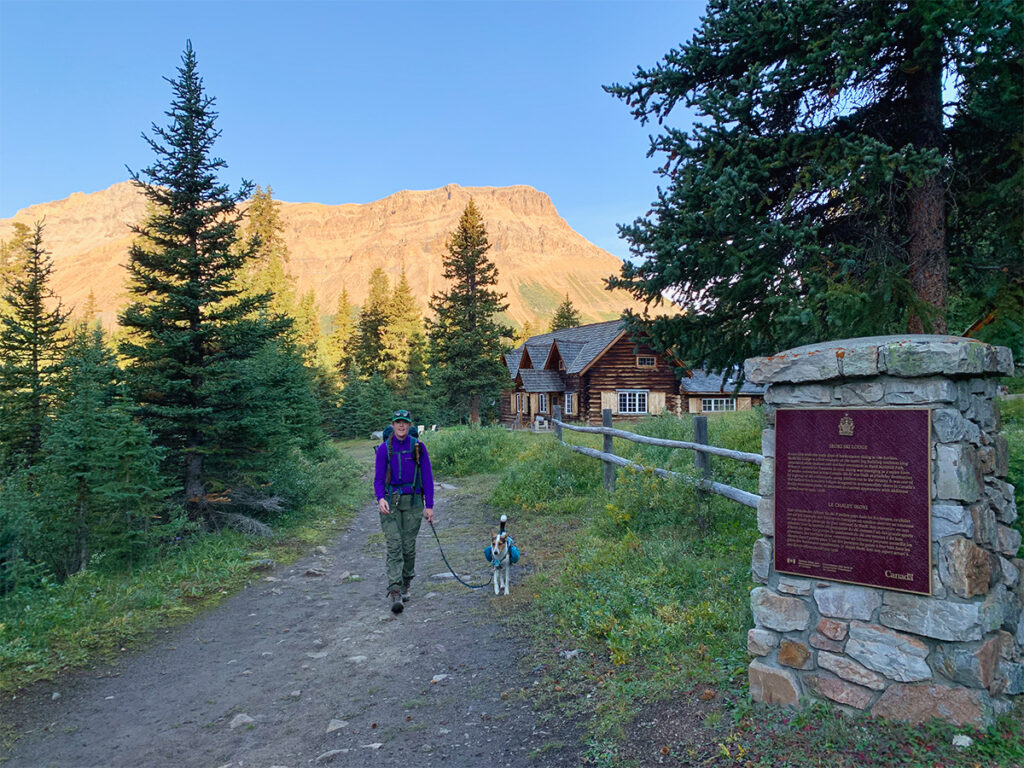
After breakfast, coffee, and packing up, we hit the trail. About 1 km in, we passed the historic Skoki Lodge and got our first proper look at it. It’s rustic, charming, and full of character. We had fun imagining what it must’ve been like to be one of the first guests to stay there when it opened nearly a century ago.
Skoki Lodge was built in 1931 and was one of the first backcountry ski lodges in the Canadian Rockies. It has hosted adventurers for nearly a century, including a visit from British royalty, and remains a National Historic Site. For quite a pretty penny, you could stay here, too! Honestly, it seems so worth it! Especially for a wintertime backcountry ski trip.
If you pass by, be sure to stop and read the Parks Canada plaque out front. I love a good historical info moment!
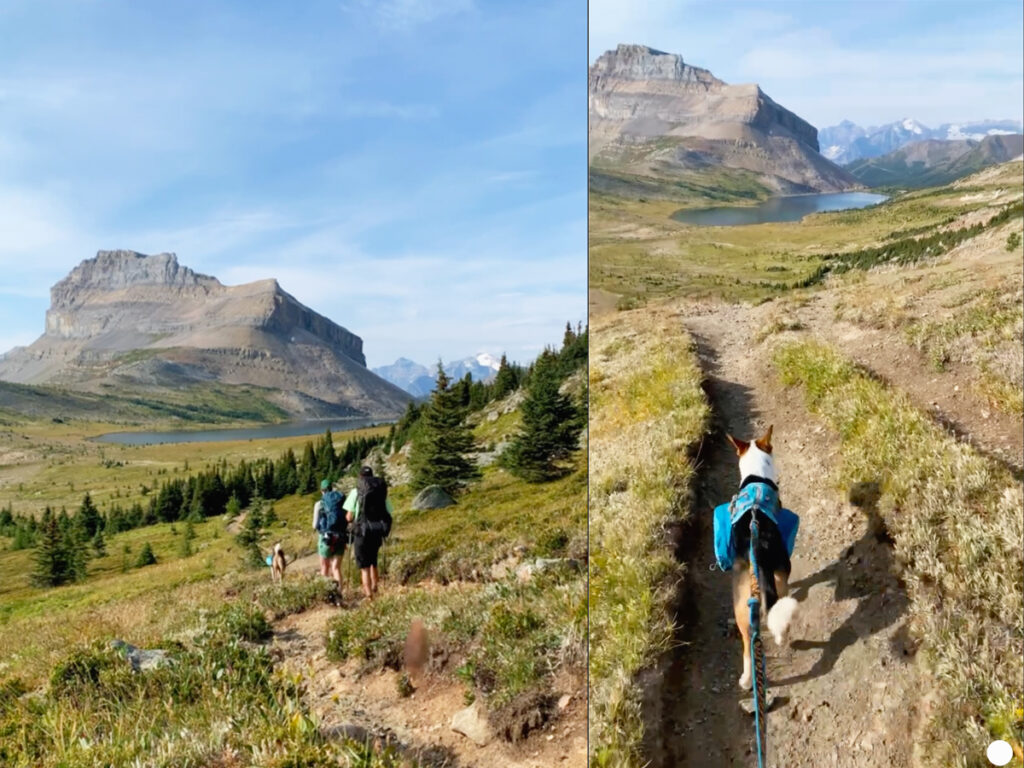
Day 3: Deception Pass
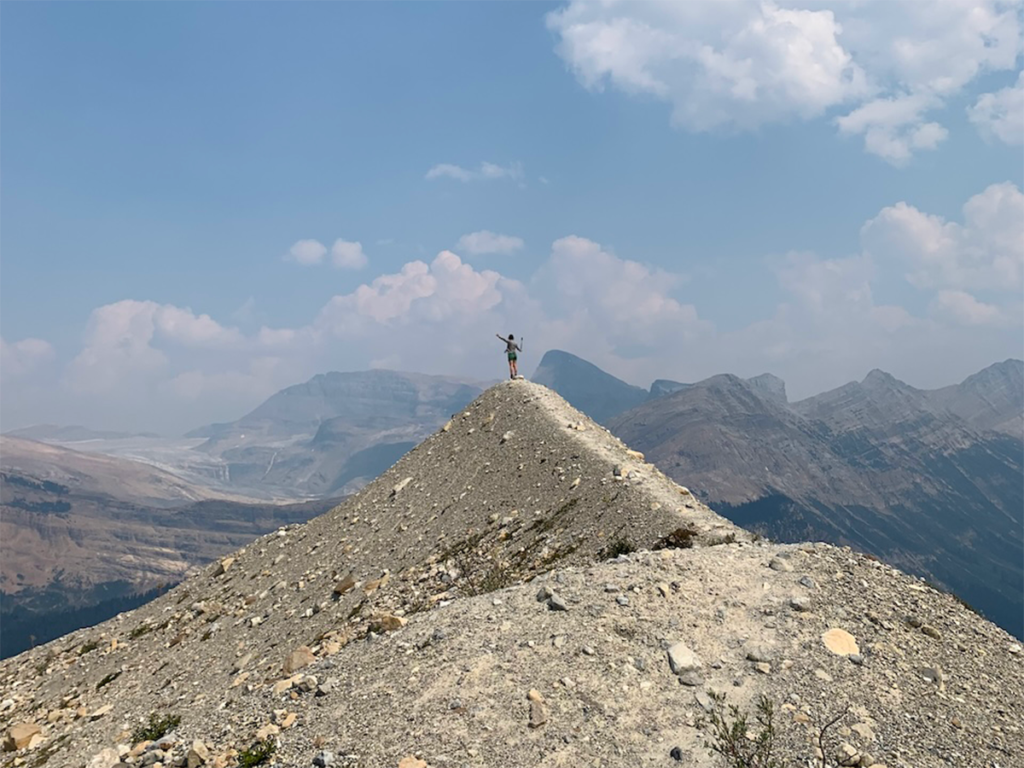
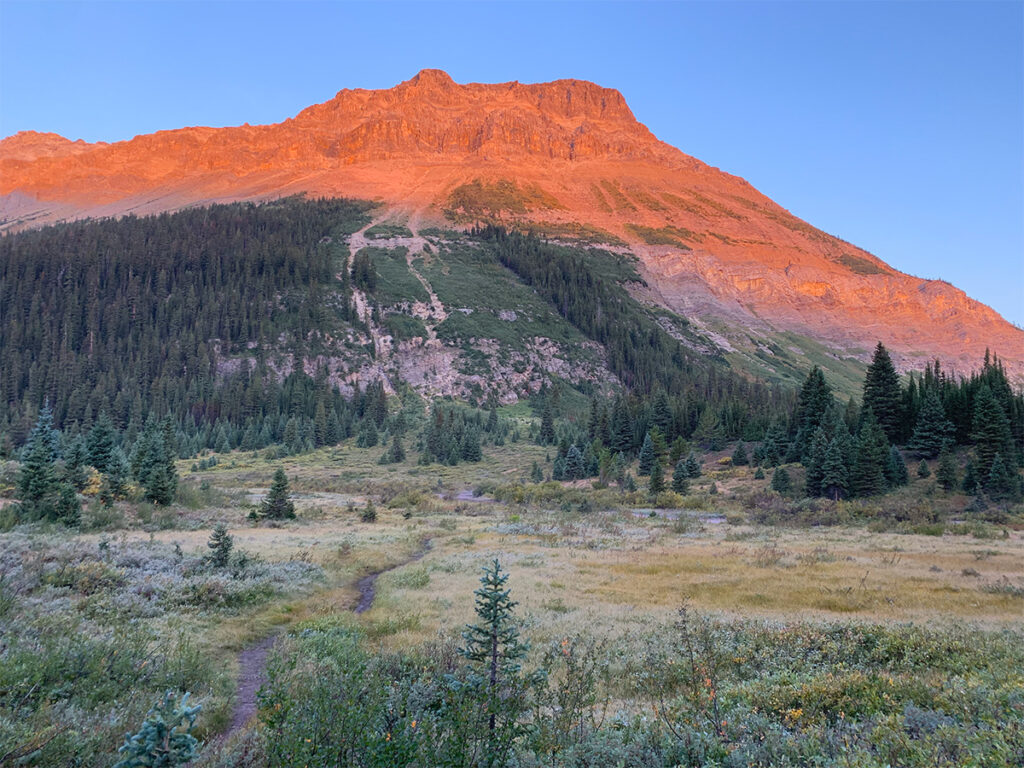
After passing the historic Skoki Lodge, you’ll begin the climb up Deception Pass, the highest point of elevation on the entire Skoki Loop! Topping out at 2,450 metres, this section may sound intimidating at first, but don’t worry, the trail is surprisingly gentle. There are no steep switchbacks—just a steady, scenic ascent with incredible views of mountains and valleys the entire way.
Because we started our day early, we were treated to the most beautiful golden light on the mountains as we reached the summit of Deception Pass. The morning sun hitting Redoubt Mountain in the distance was pure magic.
Day 3: The Return Trip to the Car
The descent from Deception Pass and the hike back to the trailhead were absolutely beautiful. Even though it was our longest hiking day of the trip, the steady downhill and gradual loss of elevation made it easier to maintain a comfortable pace. We made it back to the car around 1 p.m., giving us plenty of time for the five-hour drive home to The Okanagan.
Packing for Backcountry Camping in Banff: Skoki Loop
What to Pack:
When packing, the main thing to remember is that the weather can change in an instant when you’re adventuring in the mountains. You’ve probably heard the saying “if you don’t like the weather, just wait 10 minutes”. This is the code to live by when you’re packing for mountain adventures!
Packing the 10 Essentials for any hike or backpacking trip is like getting your adventure BFFs together! They’ve always got your back! These essentials aren’t just for emergencies; they’re your go-to crew for staying safe, comfy, and ready for whatever wild surprises the trail throws at you.
Alright, let’s get into your packing list for an an unforgettable trip of backcountry camping in Banff:
The 10 Essentials
- Navigation (paper map or on your phone, compass, GPS)
- Headlamp (with extra batteries)
- Sun protection (sunglasses, sunscreen, hat)
- First aid kit
- Knife (or multitool)
- Fire (matches, lighter, and firestarter)
- Shelter (emergency bivy or space blanket)
- Extra food
- Extra water
- Extra clothes (for insulation and weather protection)
Backpacking Gear:
- Backpack (with a comfortable fit and enough capacity for your gear)
- Tent (or a lightweight shelter)
- Sleeping bag (appropriate for the season)
- Sleeping pad (for insulation and comfort)
- Trekking poles (optional but helpful for stability)
Clothing:
- Moisture-wicking base layers (top and bottom)
- Insulating layers (fleece or down jacket)
- Rain jacket and pants (waterproof and breathable)
- Hiking boots or shoes (well broken-in)
- Sandals (to wear in the water or at camp)
- Wool socks (plus an extra pair or two)
- Hat and gloves (for warmth)
- Sun hat (for protection)
- Buff or bandana (versatile for sun, wind, and sweat)
Cooking & Food:
- Lightweight stove (with fuel)
- Cooking pot and utensils
- Biodegradable soap (and a small sponge)
- Food (freeze-dried meals, snacks, trail mix)
- Bear-proof food storage (bear canister or Ursack)
- Water filter or purification tablets
- Water bottles or hydration reservoir
Personal Items:
- Toothbrush and toothpaste (travel-sized)
- Toilet paper (and a small trowel for digging a cat hole)
- Quick-dry towel
- Sunscreen and lip balm (with SPF)
- Bug spray
- Camp sandals or lightweight shoes (for around camp)
- Reusable bags (for packing out trash)
- Camera or smartphone (for capturing the adventure)
- Portable charger (for electronics)
- Book, e-reader, journal, or deck of cards (for downtime)
Skoki Loop Trail Details – Continued!
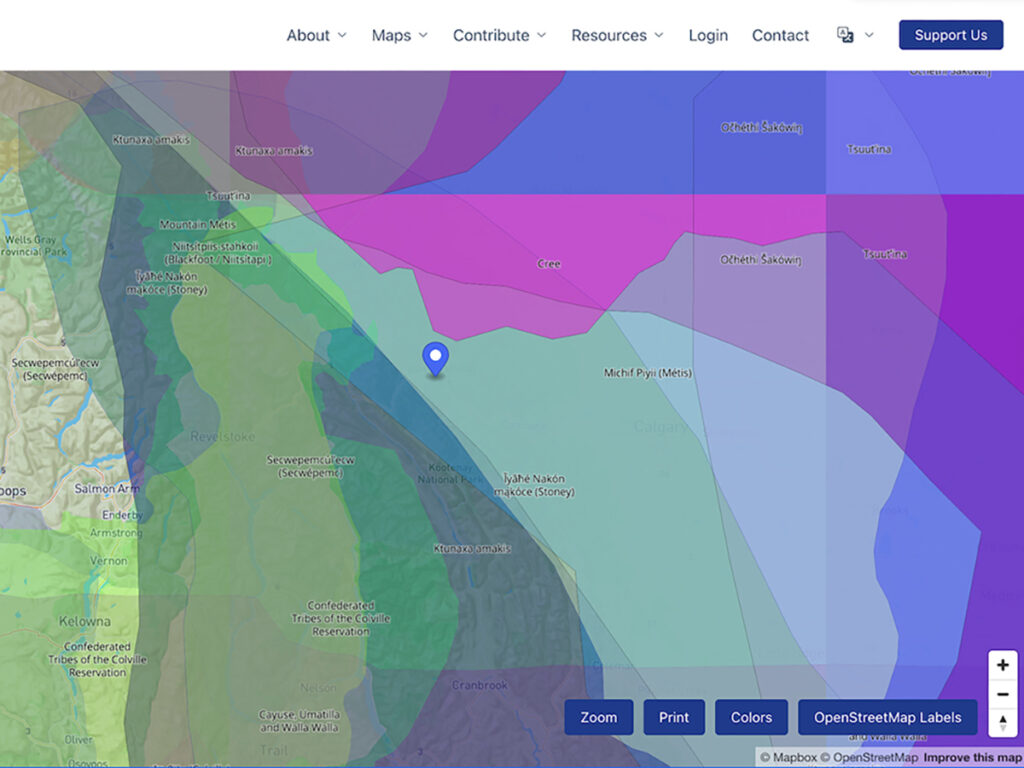
Whose Land Are You On?:
Banff National Park falls within the traditional territories of several Indigenous nations, including the Tsuut’ina Nations (Tsuut’ina pronounced SOO-tih-nah), Ktunaxa ɁamakɁis (Ktunaxa pronounced ‘k-too-nah-ha’), Ĩyãħé Nakón mąkóce (Stoney Nakoda), and the Niitsítpiis-stahkoii ᖹᐟᒧᐧᐨᑯᐧ ᓴᐦᖾᐟ (Siksikaitsitapi – Blackfoot Confederacy) nations.
Check out Native Land to learn more!
Native Land Digital is a not-for-profit that has created an awesome interactive map highlighting Indigenous territories, treaties and languages all around the world.
Banff National Park’s location is highlighted below.
The Best Time to Visit Banff National Park:
Generally, the best time for hiking in Banff National Park is mid-June to mid-September.
- June – generally wet with spring snowmelt and rainfall, by the end of June almost all lower elevation trails are snow-free but expect snowpack to still be present above the tree line.
- July – the valleys are generally in full summer mode and you can expect almost all trails to be snow-free and wildflowers to be popping up everywhere!
- August – Typically the driest month of the year, by mid-August we start to enter the wildfire season so watch out for wildfire reports and air quality reports.
- September – Depending on the type of year you could experience the best hiking conditions ever! But nights start to cool down significantly and there is always a chance of rain and snow.
Required Permits for Skoki Loop:
For day hiking, you’ll be required to have: a National Park Day Pass – $10.50/person (adult)
If you’re backcountry camping you’ll need to pay: a Backcountry Person Fee – $13.50/person (adult) per night and a Backcountry Campsite Fee – $11.50
Day/vehichle passes are available online or at the Banff East Gate, Banff Visitor Centre or Lake Louise Visitor Centre. You can find more information about park fees here and more about National Park reservations here.
How to Book Backcountry Camping in Banff Skoki Loop:
To hike the Skoki Loop as a multi-day backcountry backpacking trip, you’ll need to book your backcountry campsites through the online Parks Canada Reservation System.
Remember that before booking, you should: plan your route, figure out how many nights you’ll be out, and note the campsite codes along your chosen path.
Once you log into your Parks Canada Reservation account, head to the ‘Reservations’ tab. From here, ensure you are in the ‘Backcountry’ tab, then choose ‘Backcounrty Zone’. Your park should be ‘Banff, Kootenay, and Yoho Backcountry ‘ and the Select Access Point options means to select your trailhead, which should be ‘Fish Creek Trailhead’. The rest of the information, such as arrival dates, party size and number of tent pads will be custom to your needs.
Personally, I think the ideal route for backpacking in Banff on the Skoki Loop is 2 nights, 3 days; camp at Baker Lake Campground (zone code: Sk11) followed by Merlin Meadows Campground (Sk18) or the other way around.
It should look something like this:
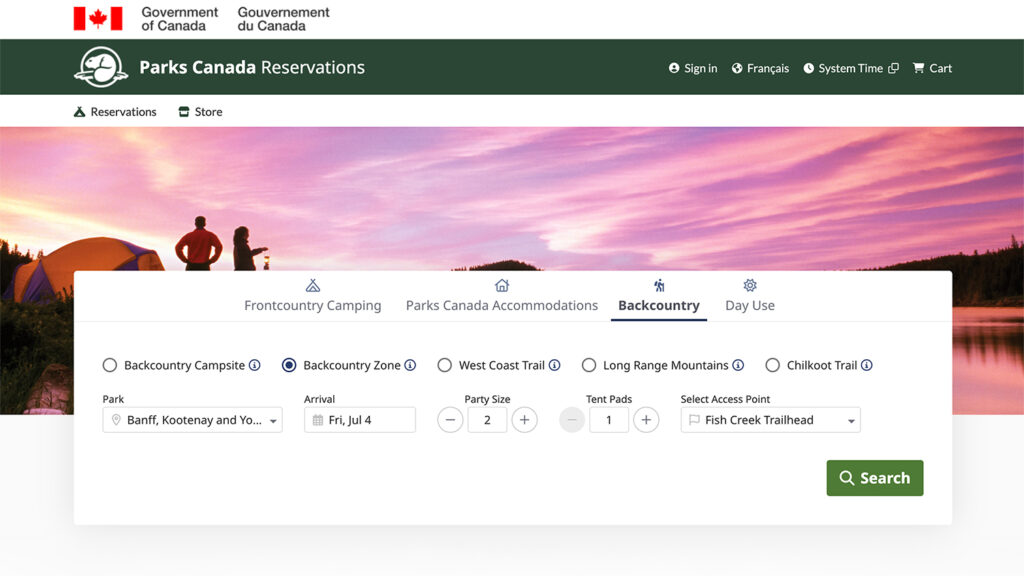
Reservations can be made online or by calling Parks Canada directly at 1-877-RESERVE (1-877-737-3783). Campsites in Banff fill up quickly (especially during the summer) so book as early as possible when reservations open (typically in January).
Checking Road and Trail Conditions:
It’s always a good idea to check out the road and trail conditions before heading out on your adventure!
Check the road conditions with DriveBC.
Check trail conditions with Parks Canada.
Where to Park:
Parking is available at the Fish Creek Trailhead. There’s a small lot, but it fills up quickly, especially on weekends. Not to worry though, the dirt road is wide and cars can park along both sides. We left our vehicle parked roadside for three days with no issues and no ticket.
More Hikes in Canadian National Parks